Channel Dashboard / Sign Up

Channel Dashboard / Sign Up

Channel Dashboard / Sign Up

Sign Up

Sign Up

Sign Up

Sign Up

Sign Up

Sign Up

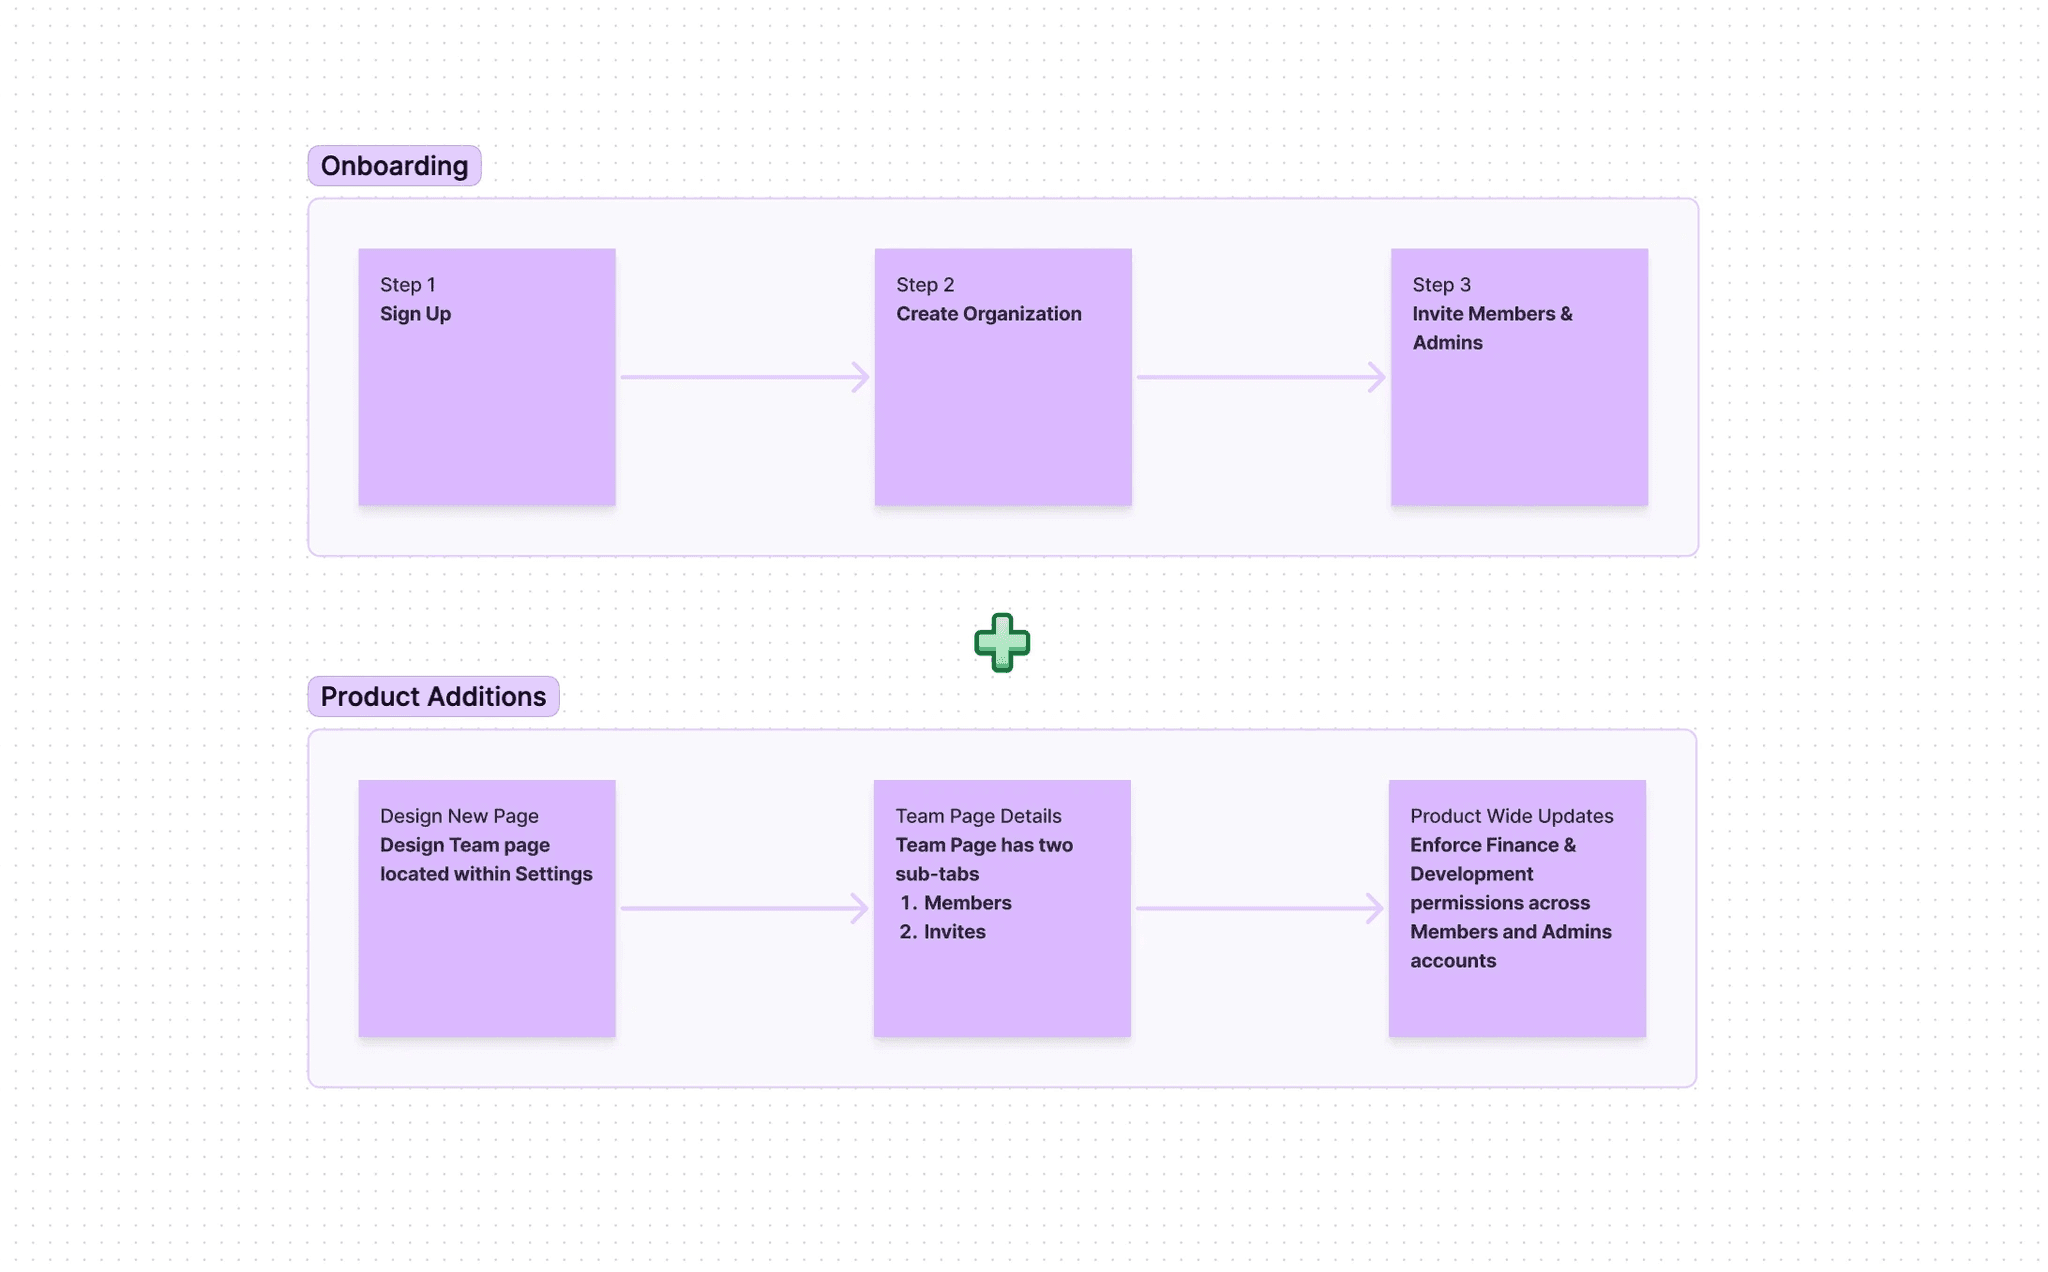
Signing up and creating an Organization is the first step the Channel user must complete when creating an account. With no hidden surprise or lengthy flows, the user can sign up and invite Members and Admins to their Organization with only three steps. 

Signing up and creating an Organization is the first step the Channel user must complete when creating an account. With no hidden surprise or lengthy flows, the user can sign up and invite Members and Admins to their Organization with only three steps. 

Signing up and creating an Organization is the first step the Channel user must complete when creating an account. With no hidden surprise or lengthy flows, the user can sign up and invite Members and Admins to their Organization with only three steps. 

Signing up and creating an Organization is the first step the Channel user must complete when creating an account. With no hidden surprise or lengthy flows, the user can sign up and invite Members and Admins to their Organization with only three steps. 

Signing up and creating an Organization is the first step the Channel user must complete when creating an account. With no hidden surprise or lengthy flows, the user can sign up and invite Members and Admins to their Organization with only three steps. 

Signing up and creating an Organization is the first step the Channel user must complete when creating an account. With no hidden surprise or lengthy flows, the user can sign up and invite Members and Admins to their Organization with only three steps. 

Scope

Introduce an Organization feature within Violet Accounts, allowing creators to add Members and Admins from their company to their Violet Dashboard.

Problem

Previously, without Organizations, Violet users had to share their credentials, risking full access to all product areas. This hindered safe collaboration, limiting teamwork and problem-solving capabilities.

Solution

Enable users to securely invite Members and Admins to their Account, with customizable permissions for Finance and Development access.

Goal

Goal

Create an easy and effective onboarding experience the user can complete without frustration or delay. The experience required gathering personal information about the user and their company, prompting them to create an organization and providing them with the option to  invite members and admins. 

Create an easy and effective onboarding experience the user can complete without frustration or delay. The experience required gathering personal information about the user and their company, prompting them to create an organization and providing them with the option to  invite members and admins. 

Experience

Experience

As the primary goal was to ensure the user completed the onboarding experience, the flow was broken down into three main steps:

As the primary goal was to ensure the user completed the onboarding experience, the flow was broken down into three main steps:

1

Complete Sign Up form

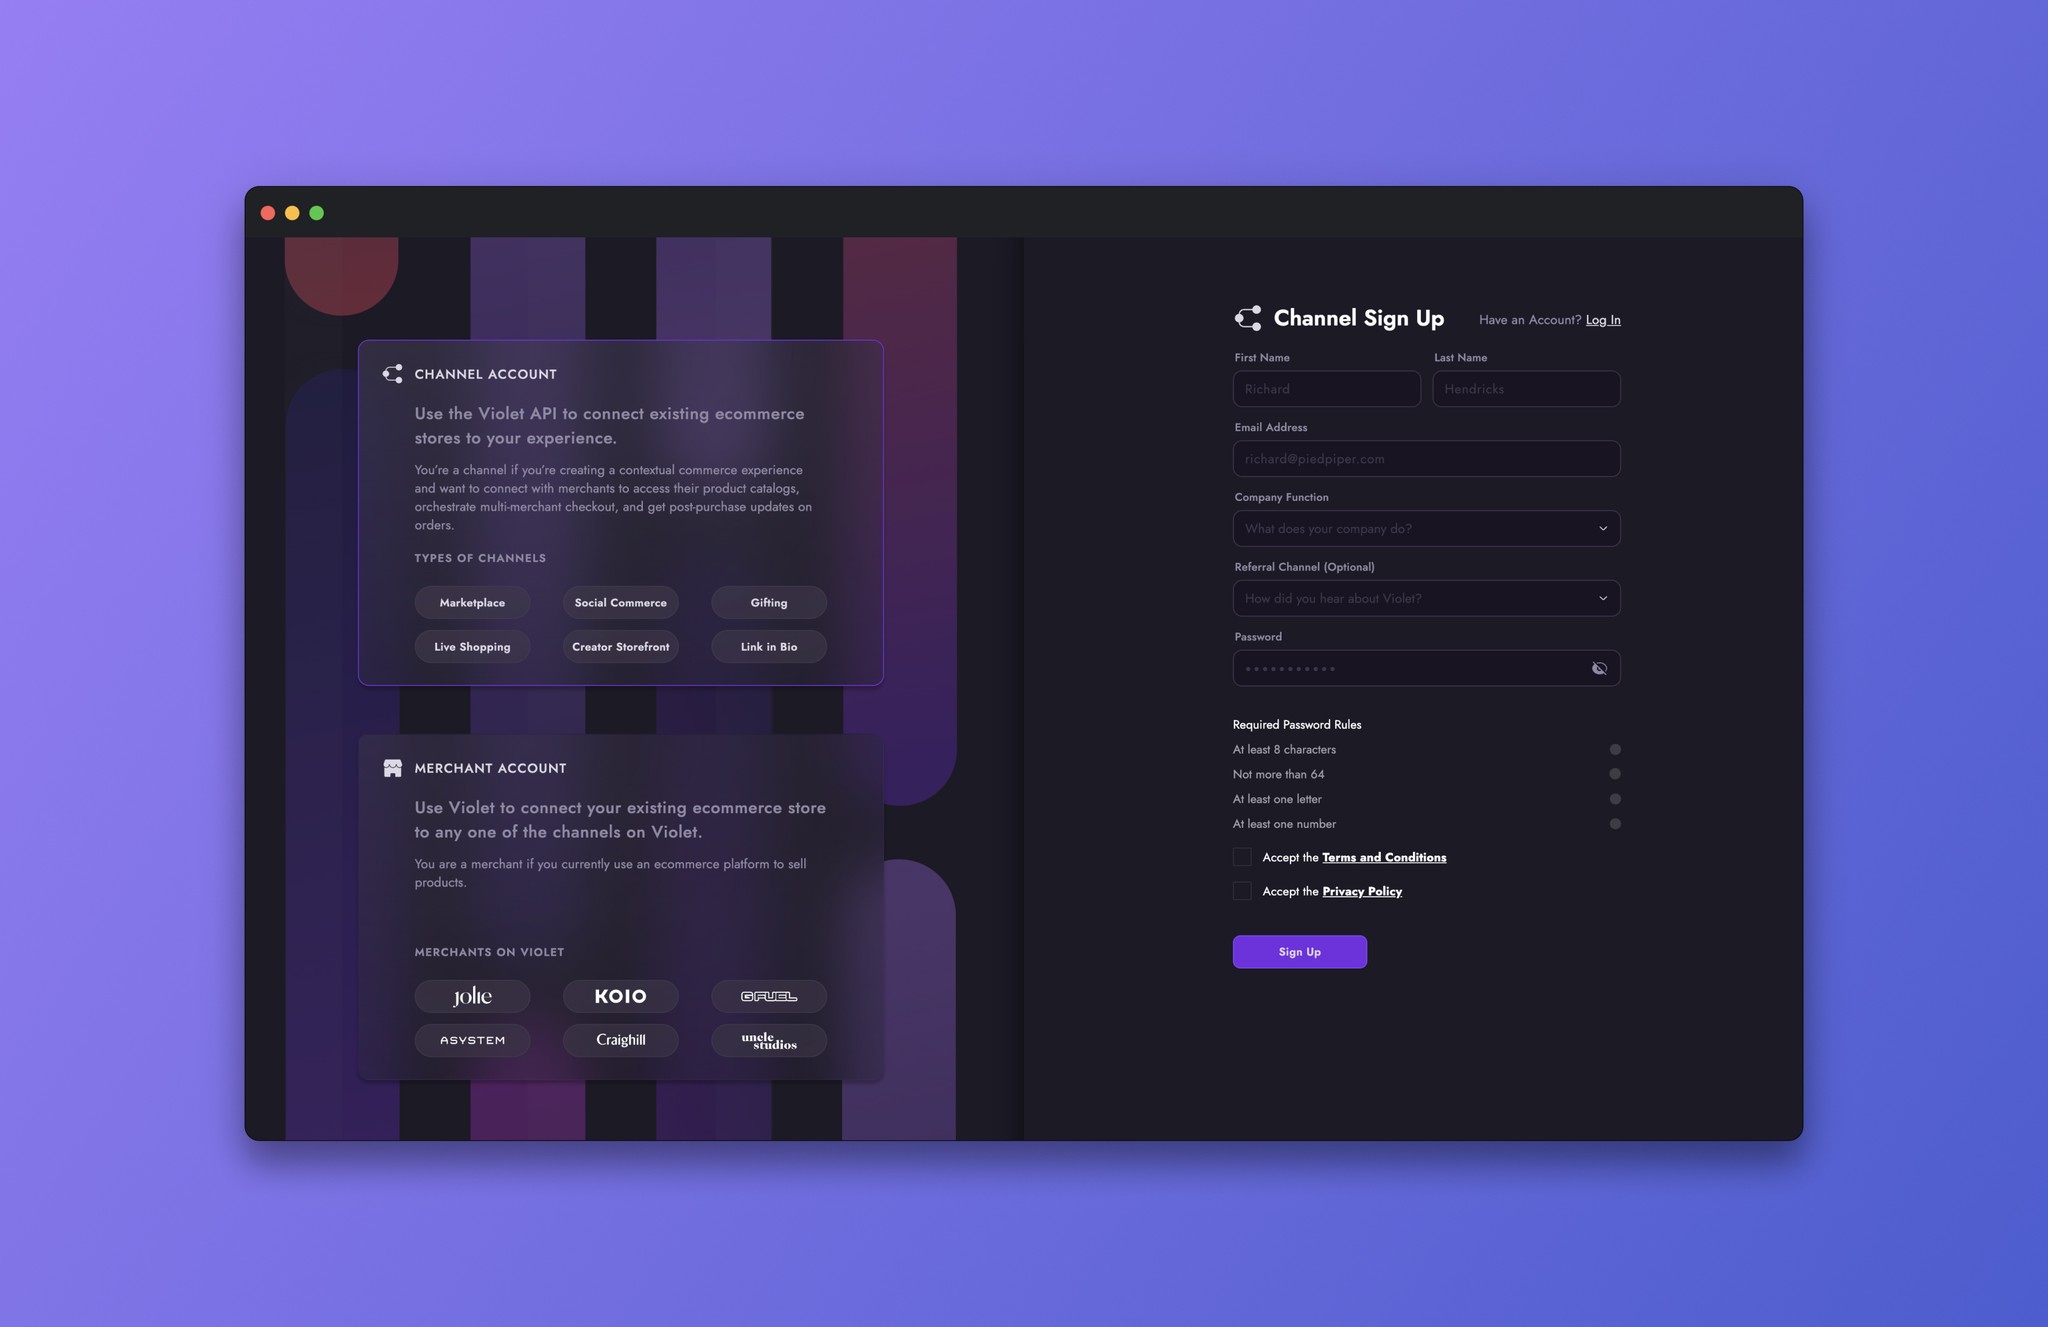
The first step of this process did not create many challenges once the decision to consolidate the information onto one page was made. The focus was instead placed on the input fields and their usability. I had the pleasure of working with one of three talented Senior Full Stack Engineers designing these inputs. They and I collaborated on the hand-off and implementation process to deliver the inputs used in both the Channel and Merchant Dashboards. 

2

Create an Organization

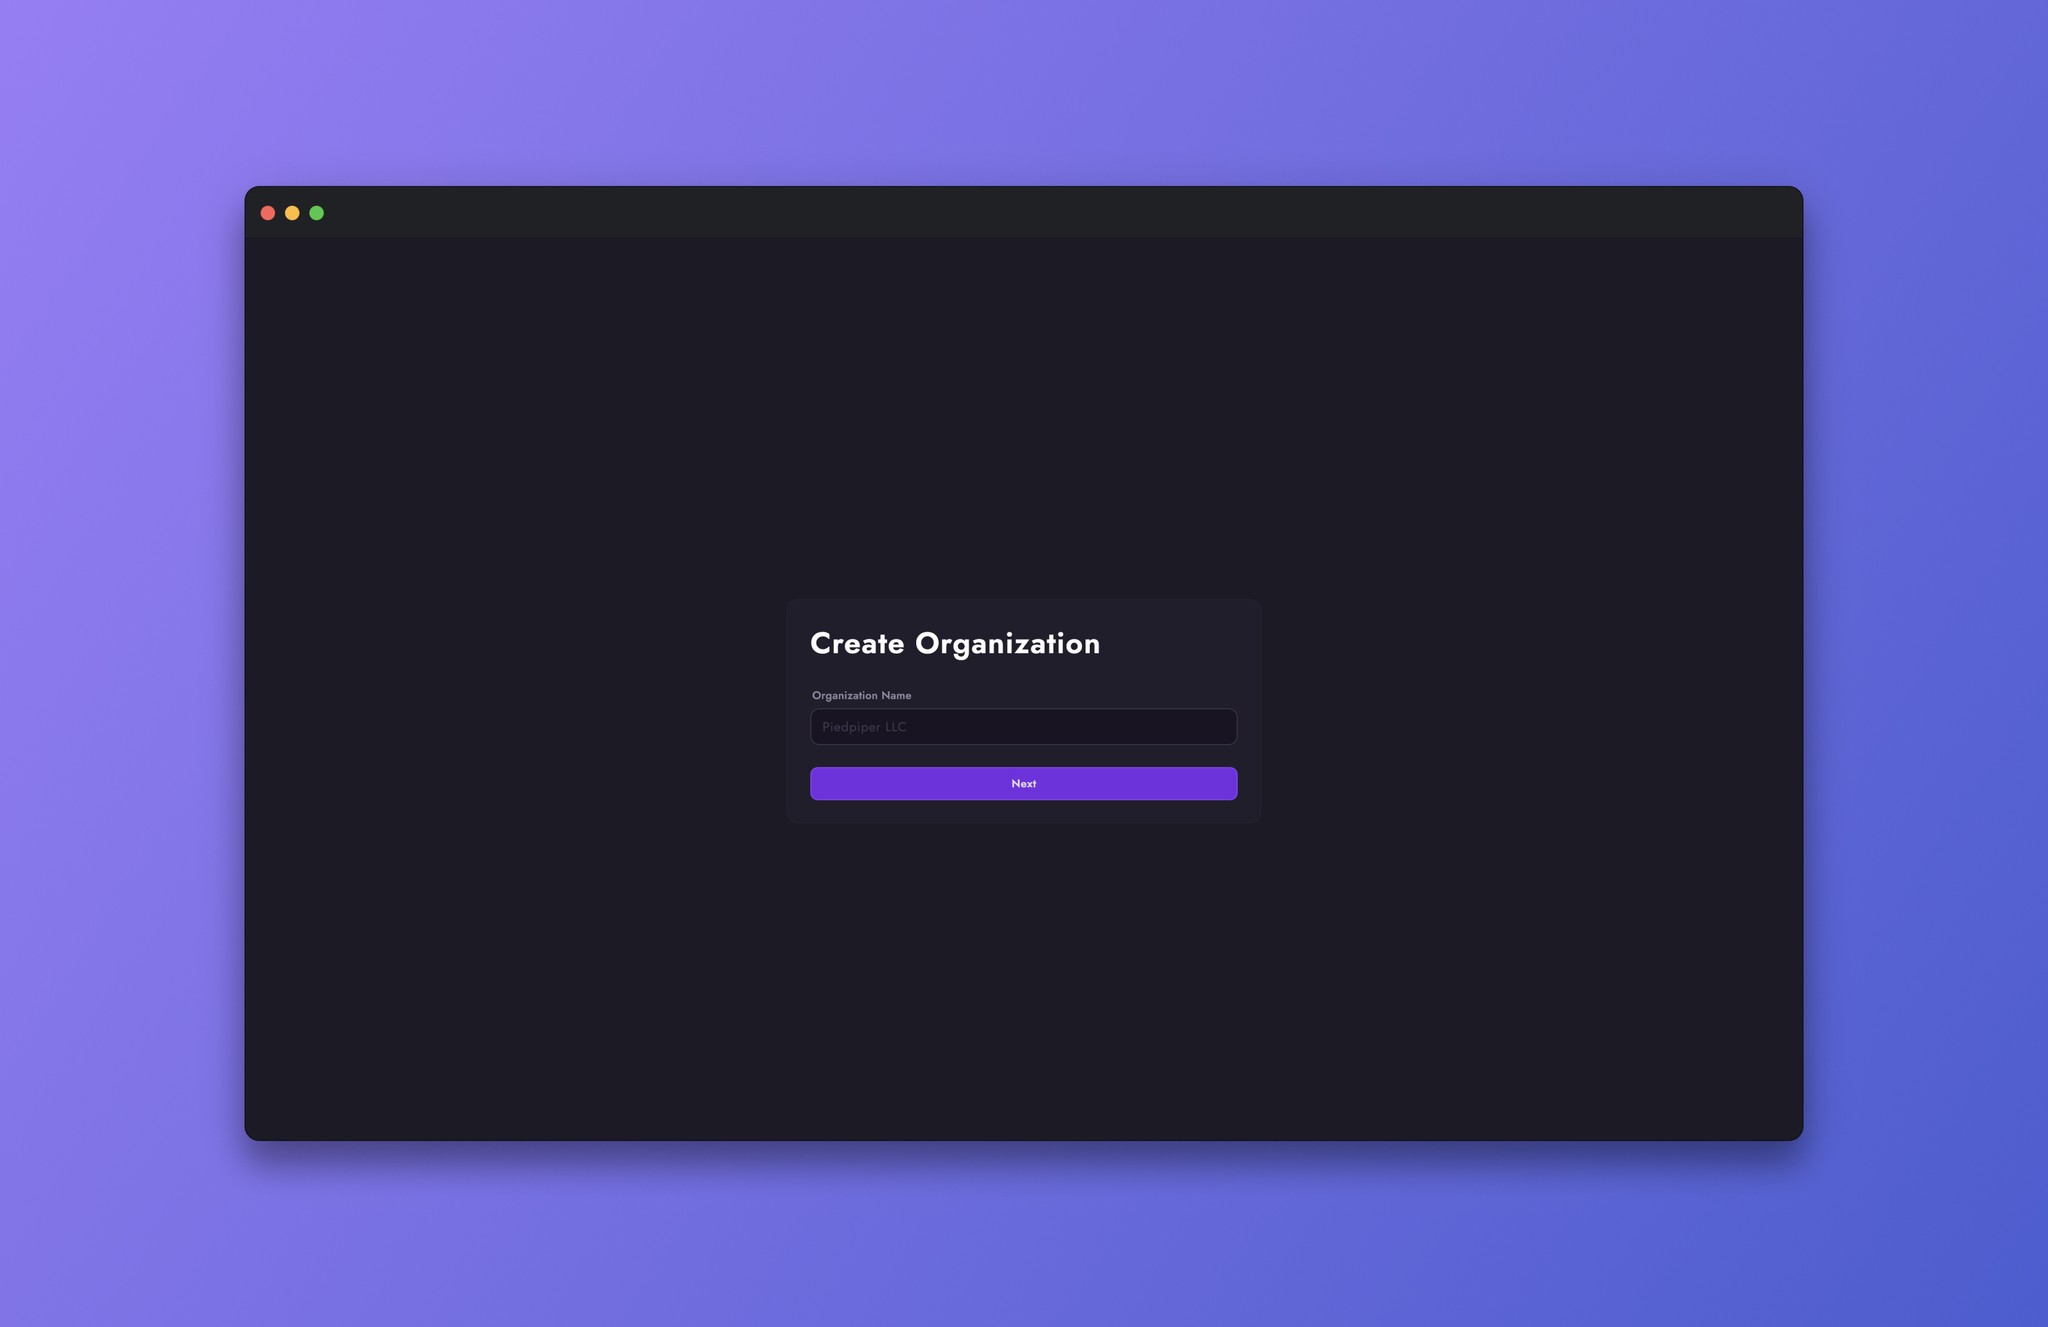
The second step of the flow was a simpler step as our goal was to draw the user's attention to creating an organization. 

3

Invite Members and Admins to their Organization

The third step held the most interesting and exciting part of this feature due to its robust requirements.

Requirements

Requirements

  1. The ability to add a user by their email address

  2. Add two types of users to the organization. A Member or an Admin

  3. Set permissions for Finance and Development 

  4. Provide a summary of invitations 

In addition to these 4 requirements, we must also understanding the differences between a Member and an Admin, and Finance and Development permissions.

Members & Admins

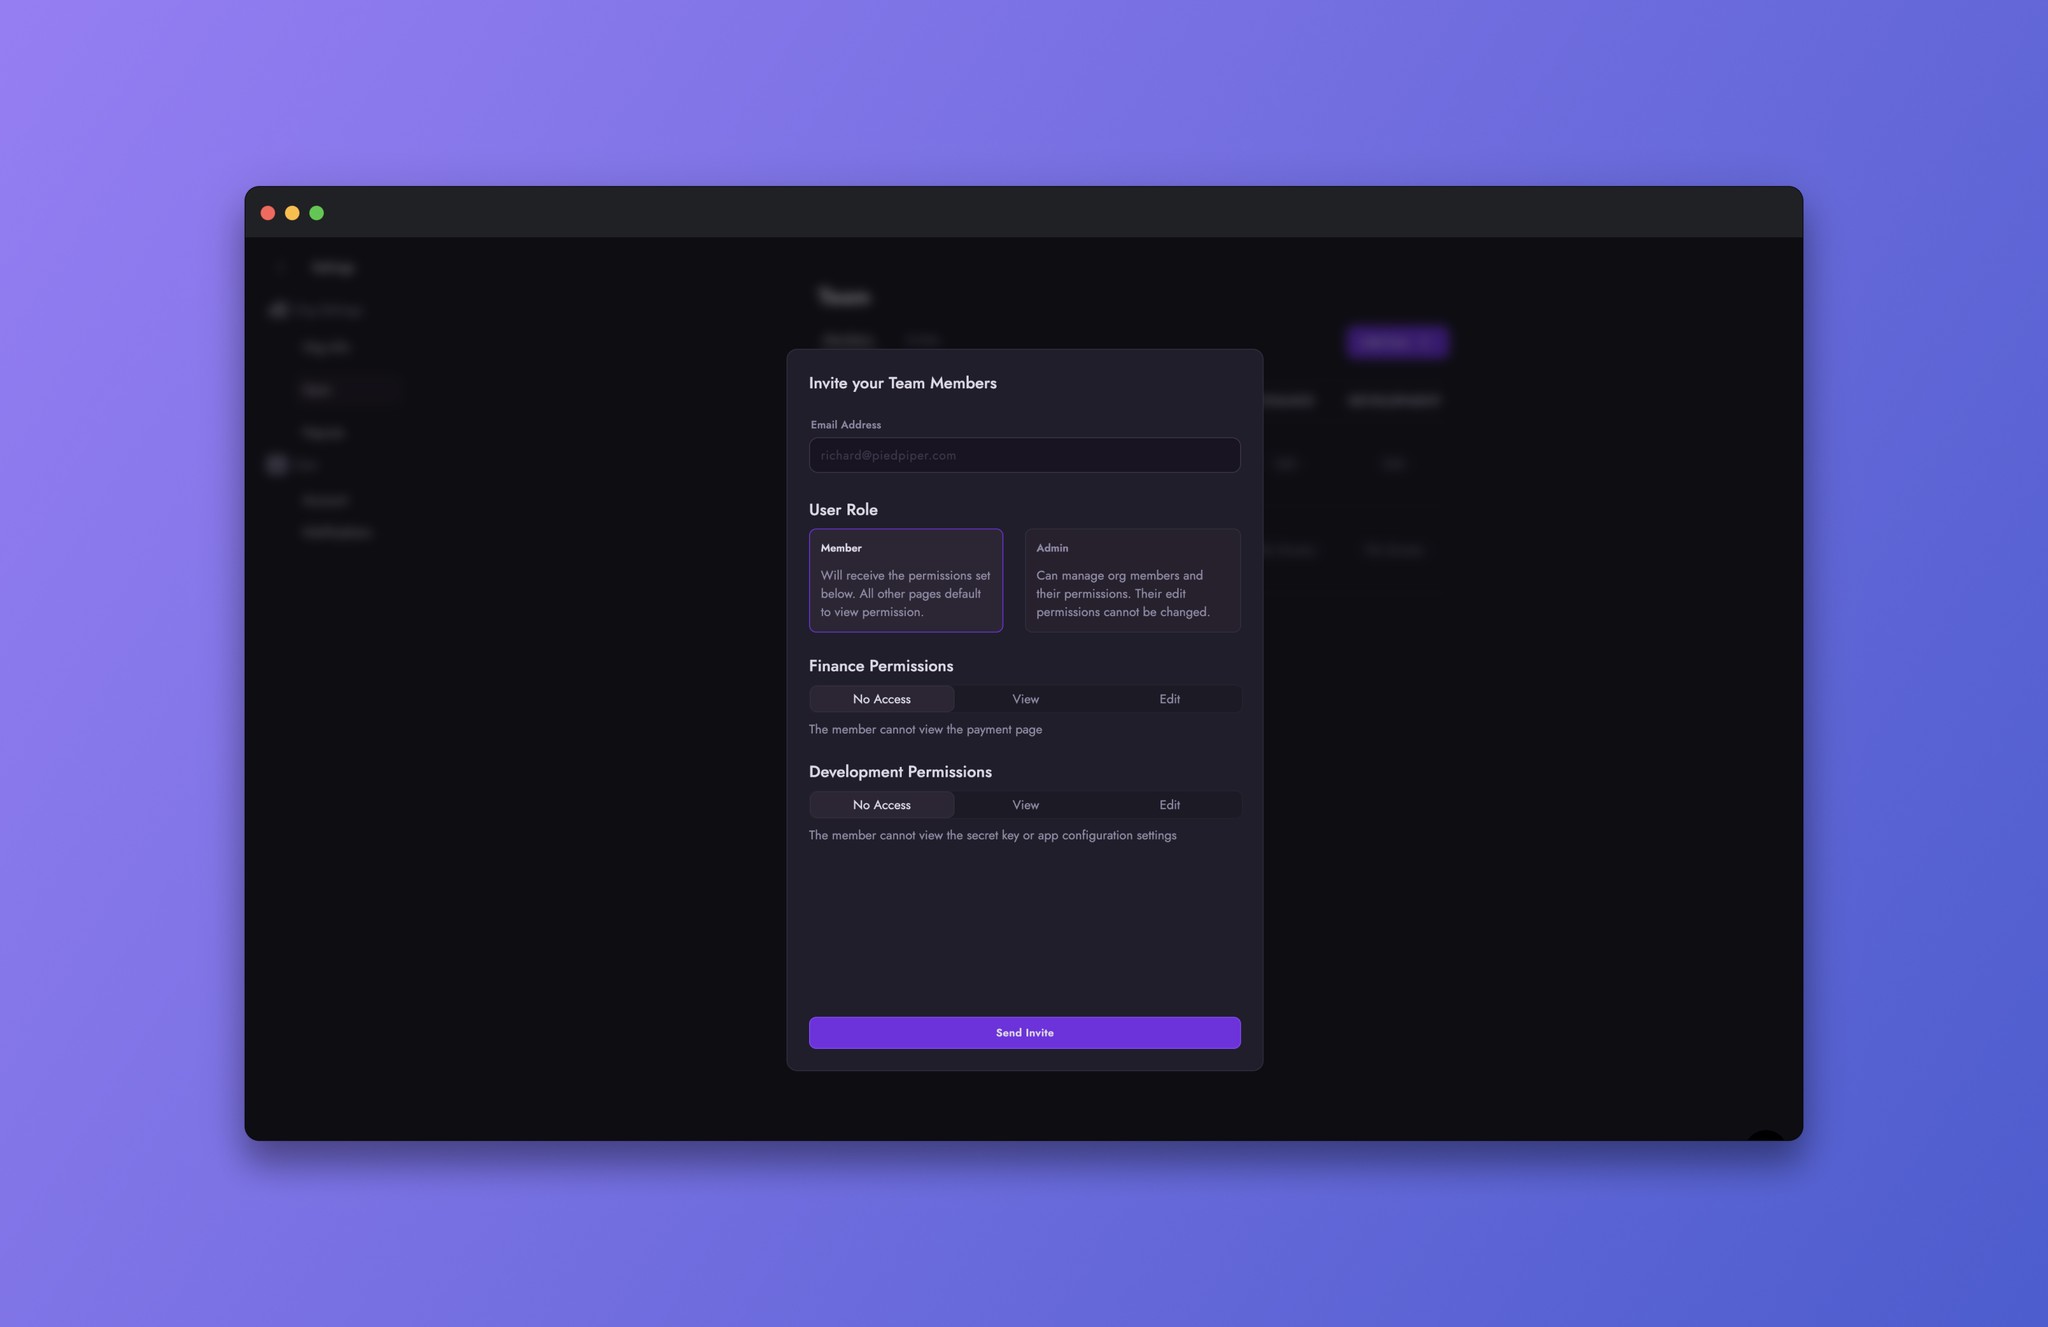
Members are user's who can have three levels of permissions per Finance and Development sections within the Dashboard, View, Edit or No Access. Members cannot mange their own or other's permissions. 

Admins are user's who can manage Member's permissions. Their permissions are set to Edit on both Finance and Development by default and cannot be changed.

Finance & Development

Finance Permissions allows the member to view + edit payment page.

Development Permissions allows the member to view + copy the secret key as well as view + edit the app configuration page.

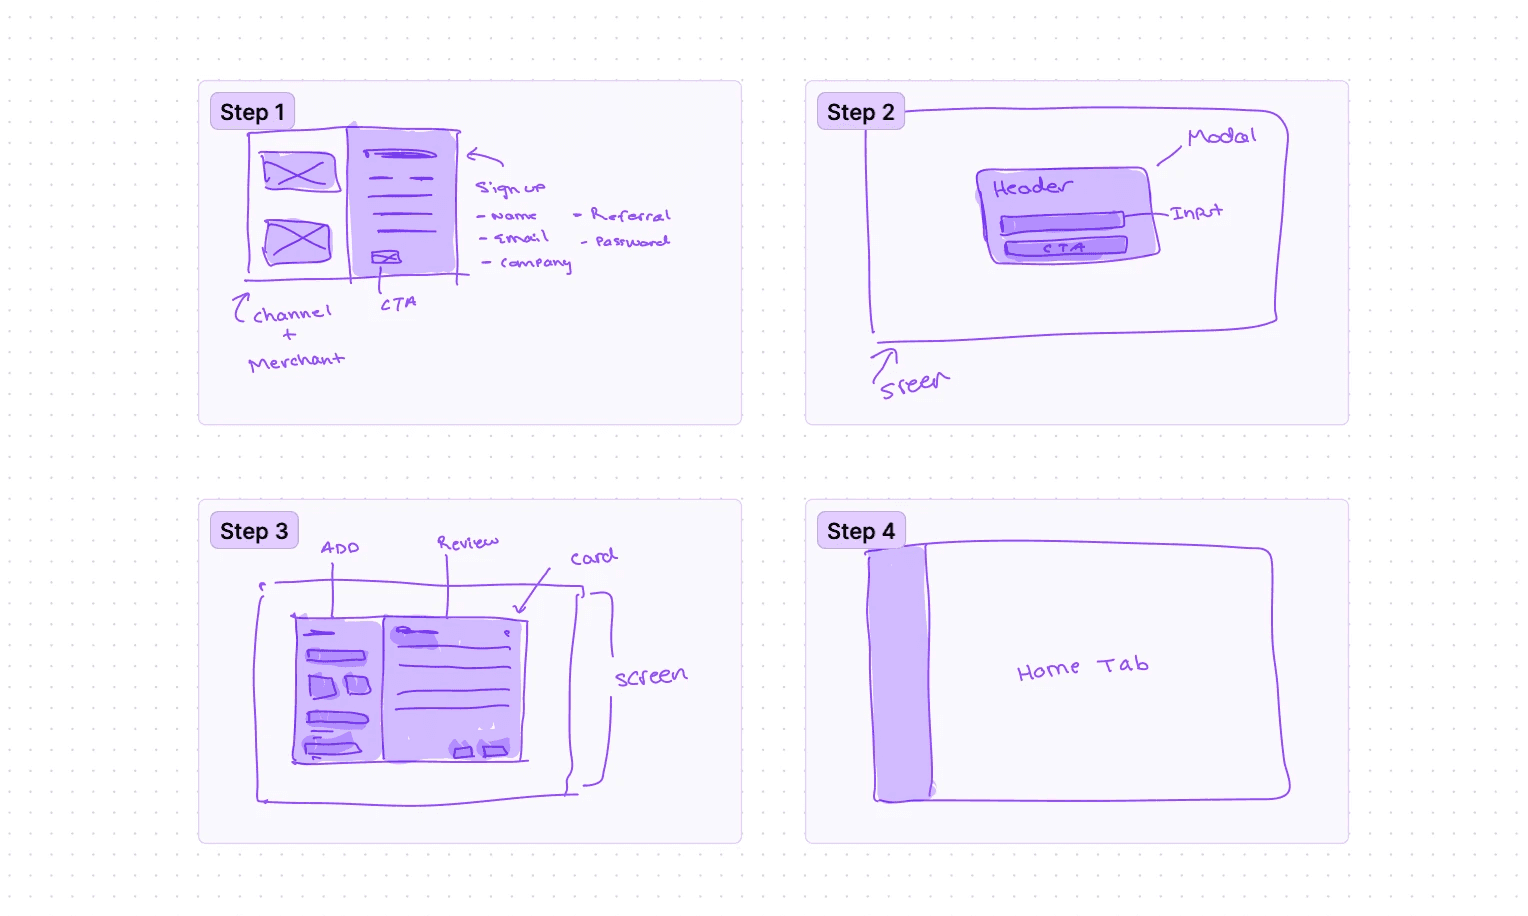
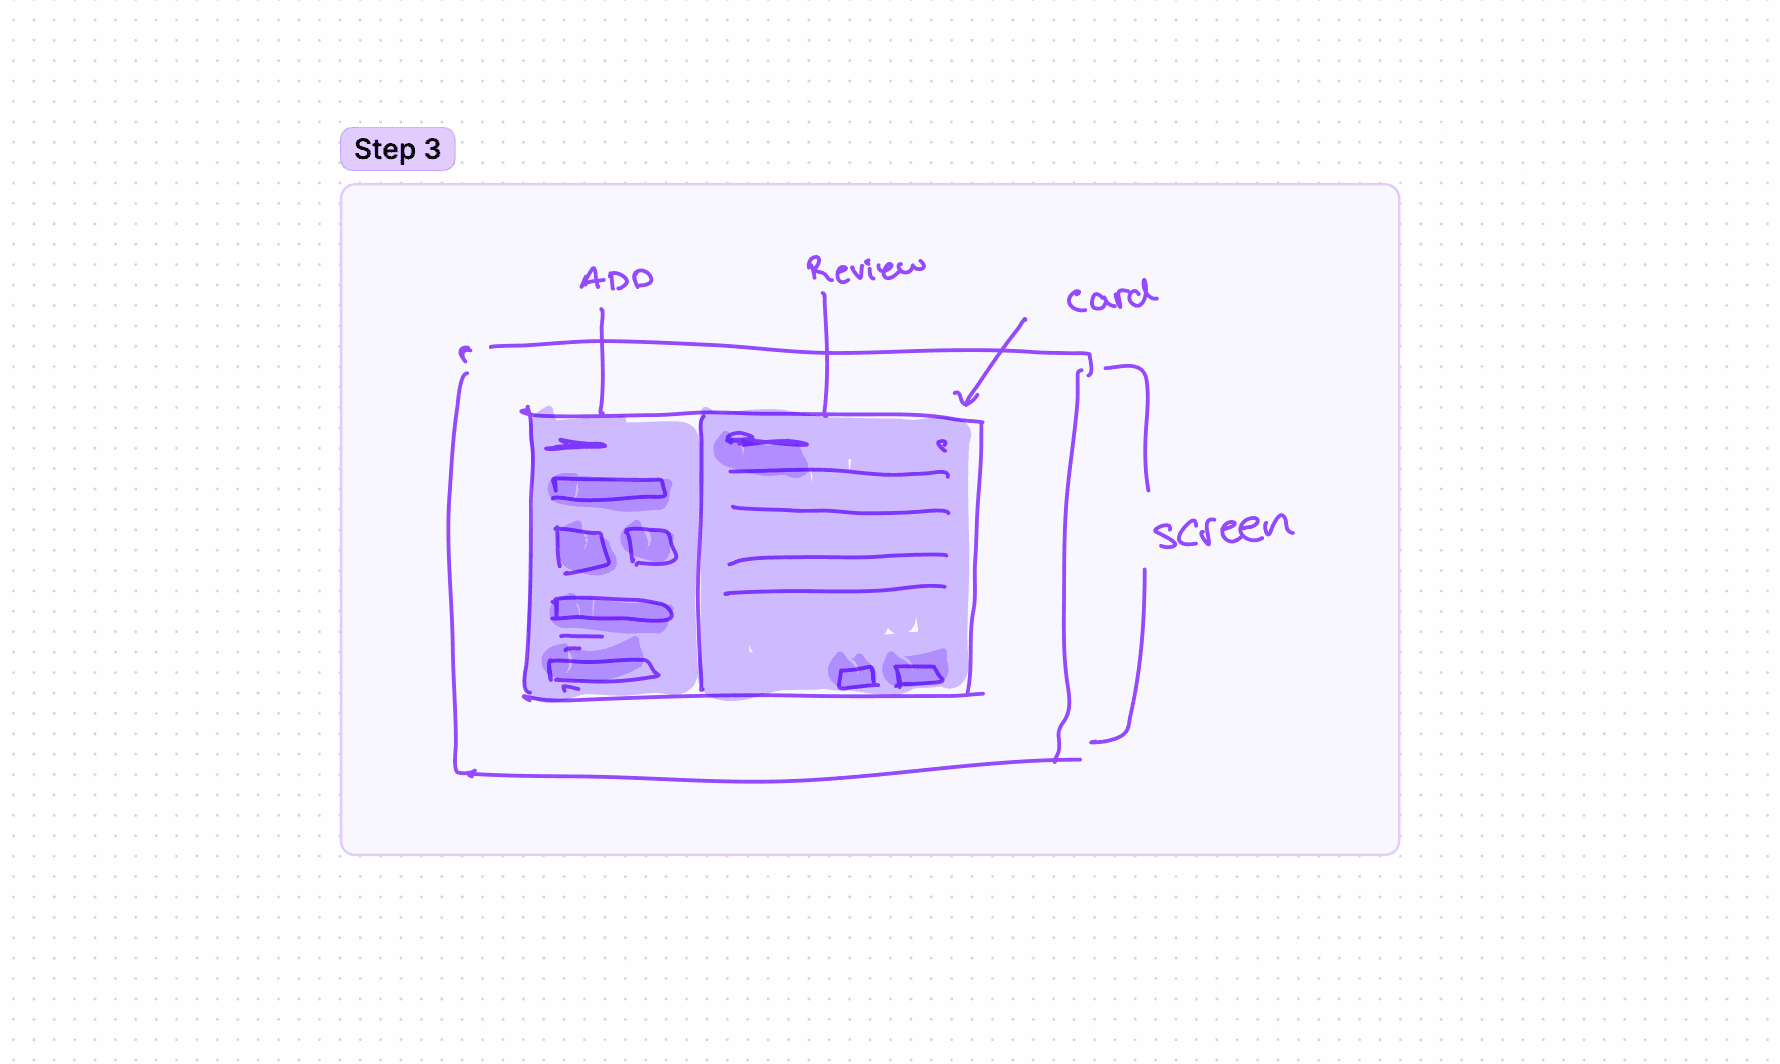
With these requirements, I started the wire-frame stage to determine the best solutions and layouts for this screen.  I started by splitting the screen into two sides. One side titled 'Invite Your Team members' and the other side titled 'Invitations to Send'.

Left Side
'Invite your Team Members'

Left Side 'Invite your Team Members'

Left Side 'Invite your Team Members'

Left Side 'Invite your Team Members'

Left Side 'Invite your Team Members'

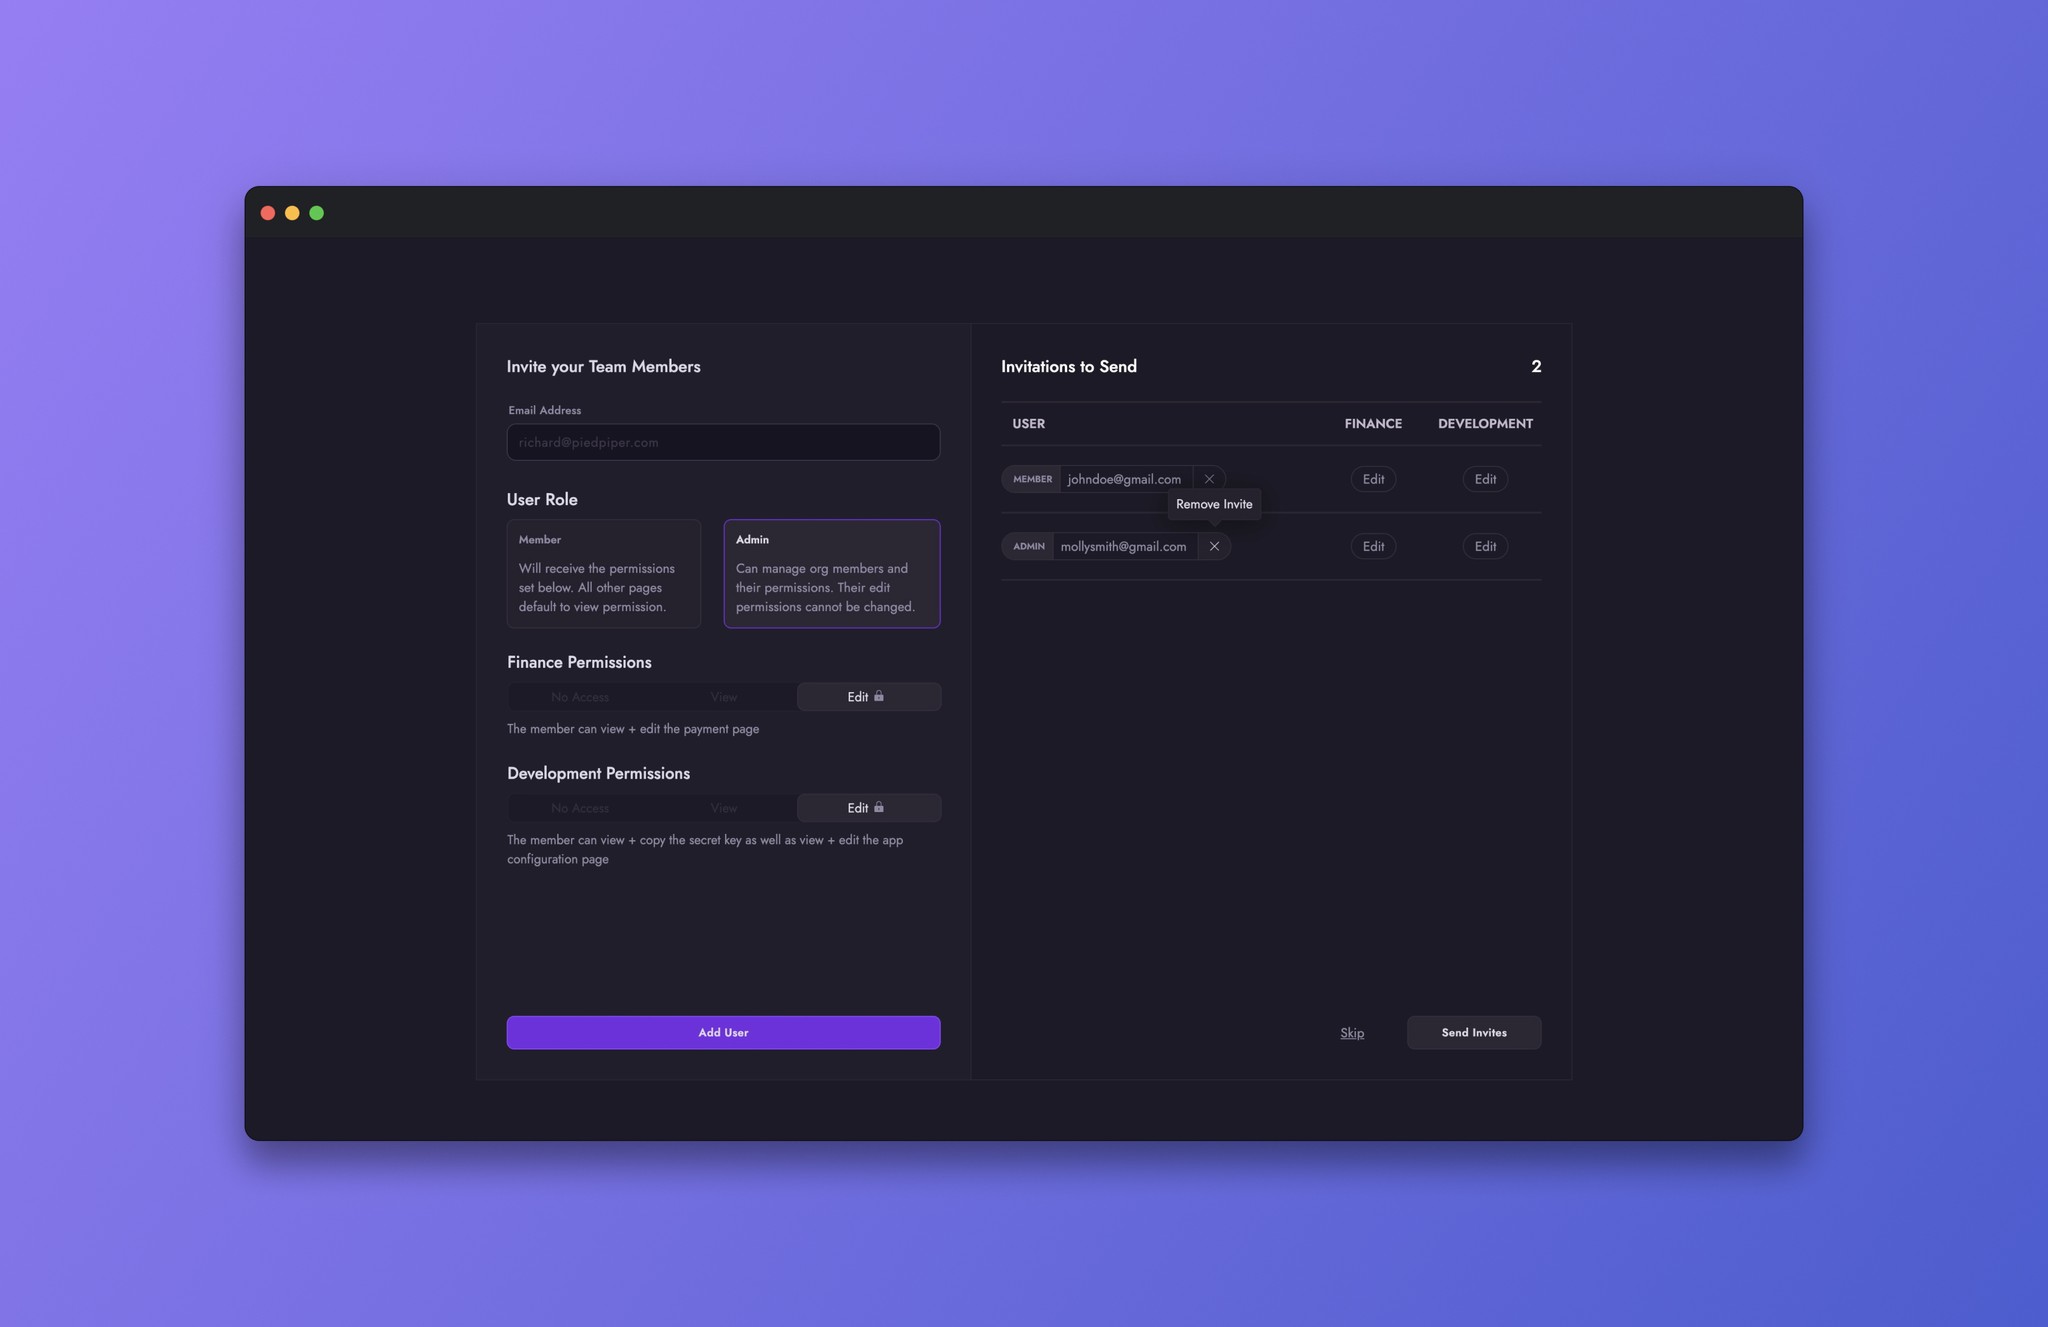
Designing with a left to right flow, I explored how to add Members and Admins to an organization. The interaction starts by the Owner of the Organization entering an email and then assigning a Member or Admin role to that team member.

Now with the email input and user roles outlined, the permission controls for Finance and Development were next. With collaboration with a Technical Product Manager, they and I crafted a sliding button design where the user could select No Access, View or Edit for user roles set to Member, and a locked variation for Admins.

Right Side
'Invitations to Send'

Right Side 'Invitations to Send'

Right Side 'Invitations to Send'

Right Side 'Invitations to Send'

Right Side 'Invitations to Send'

The right side of the screen was designed to provide the user with a summary of the Members or Admins they want to add to their organization. This section had to display the user's email, user role and permissions. To allow quick edits, we also wanted to allow the user to remove invites within this summary.

The right side review section was designed to be a small table, providing space for large list of invitations. Each row contained the user's role and email address. This design was selected based off its readability, sleek appearance and removal micro-interaction. To the right of the table are the permissions set for Finance and Development. Once the user was ready to send all invitations, they could click the button titled 'Send Invites'. 

Results of onboarding flow

The overall look of this screen was balanced and provides the user structure and clarity to quickly add team members to their Organization.

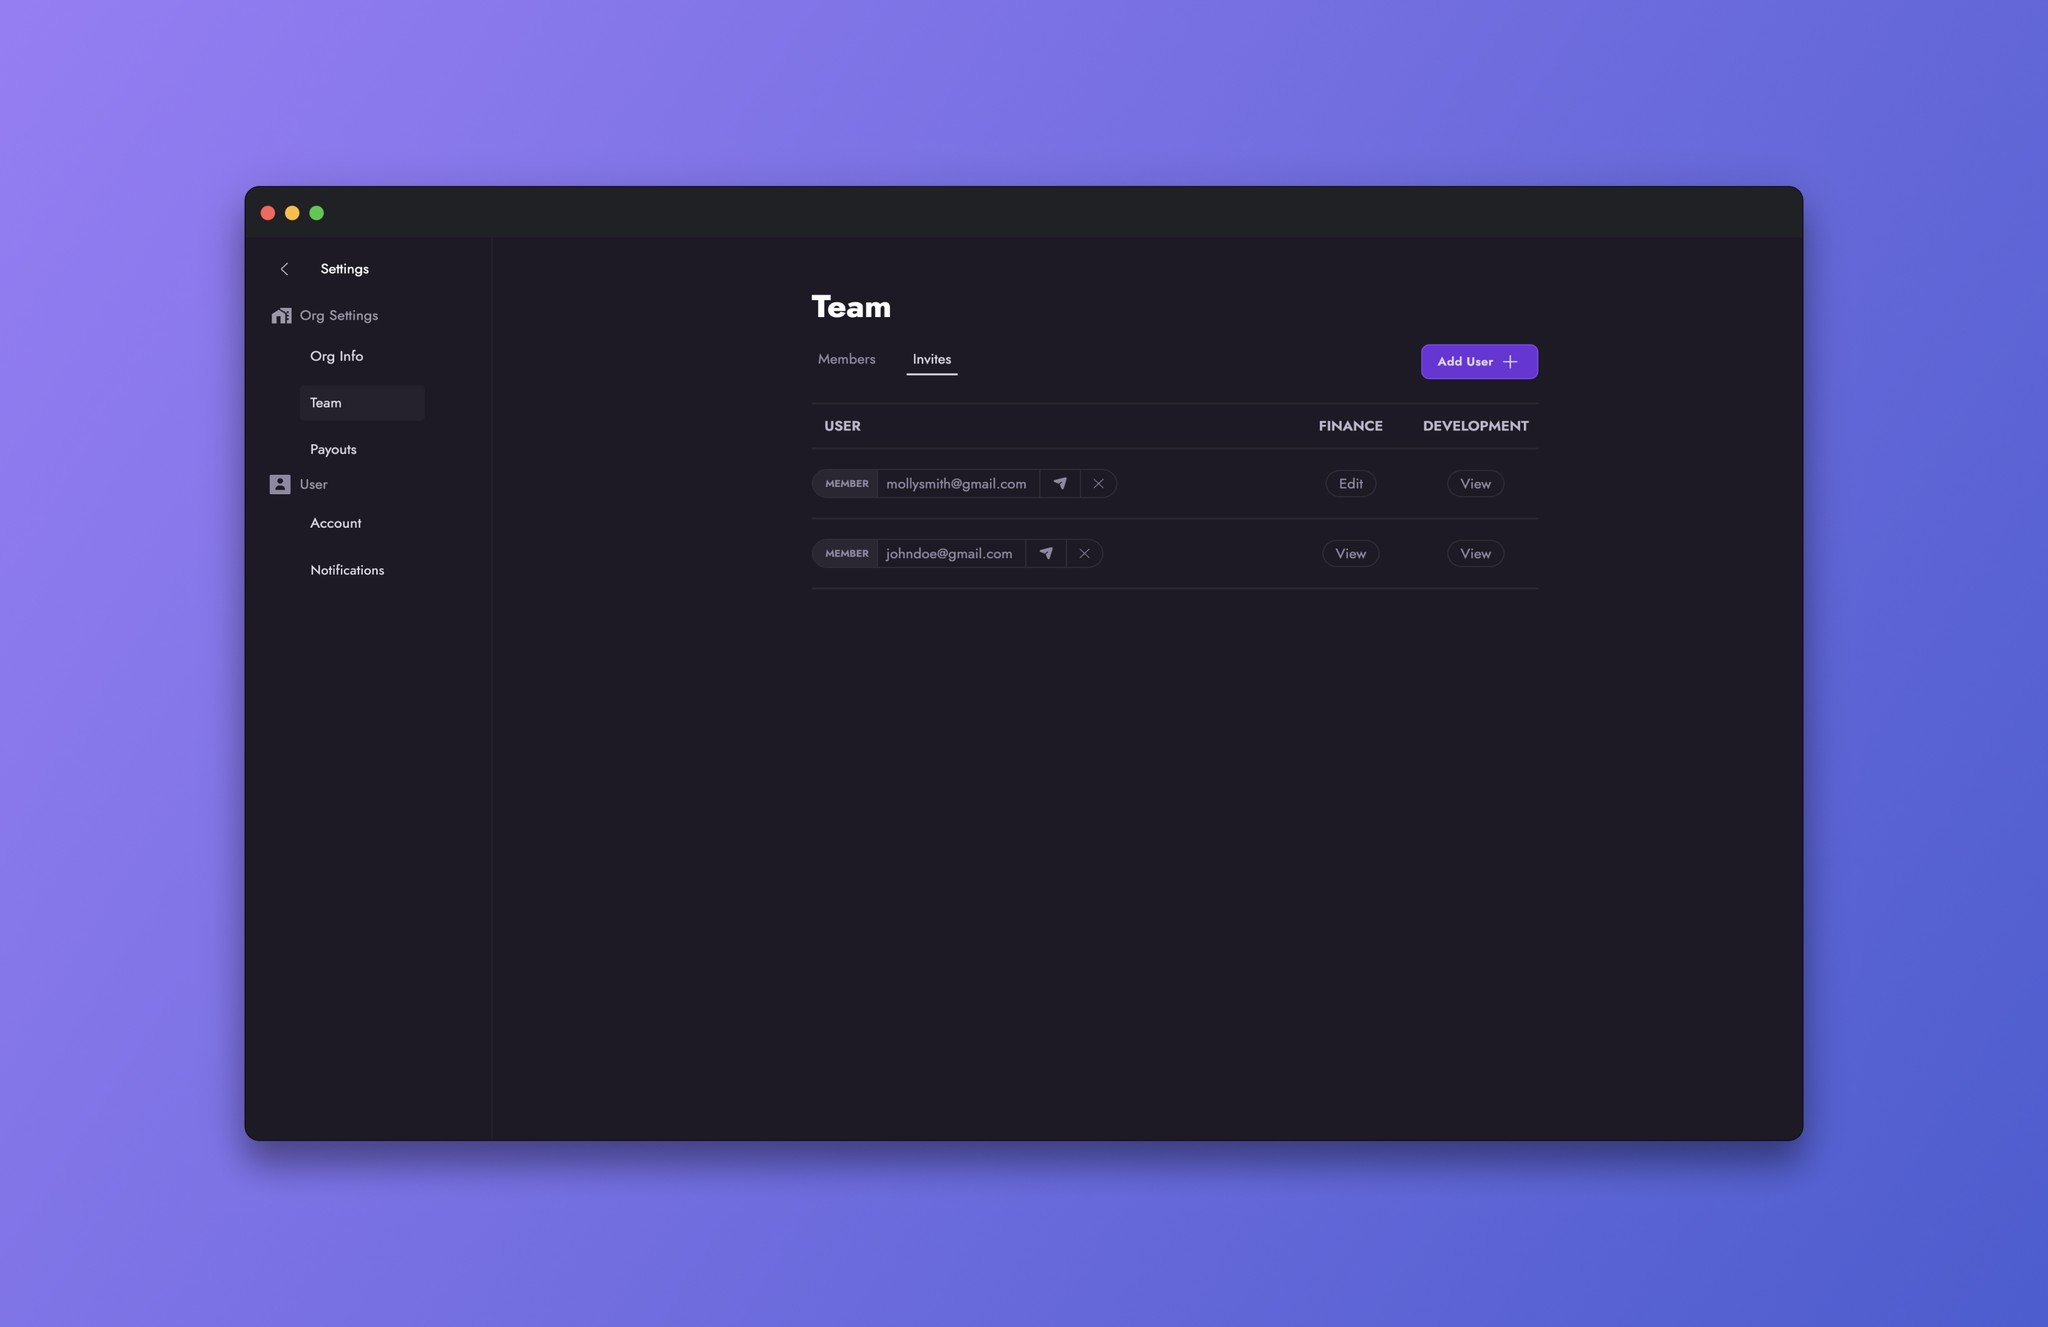
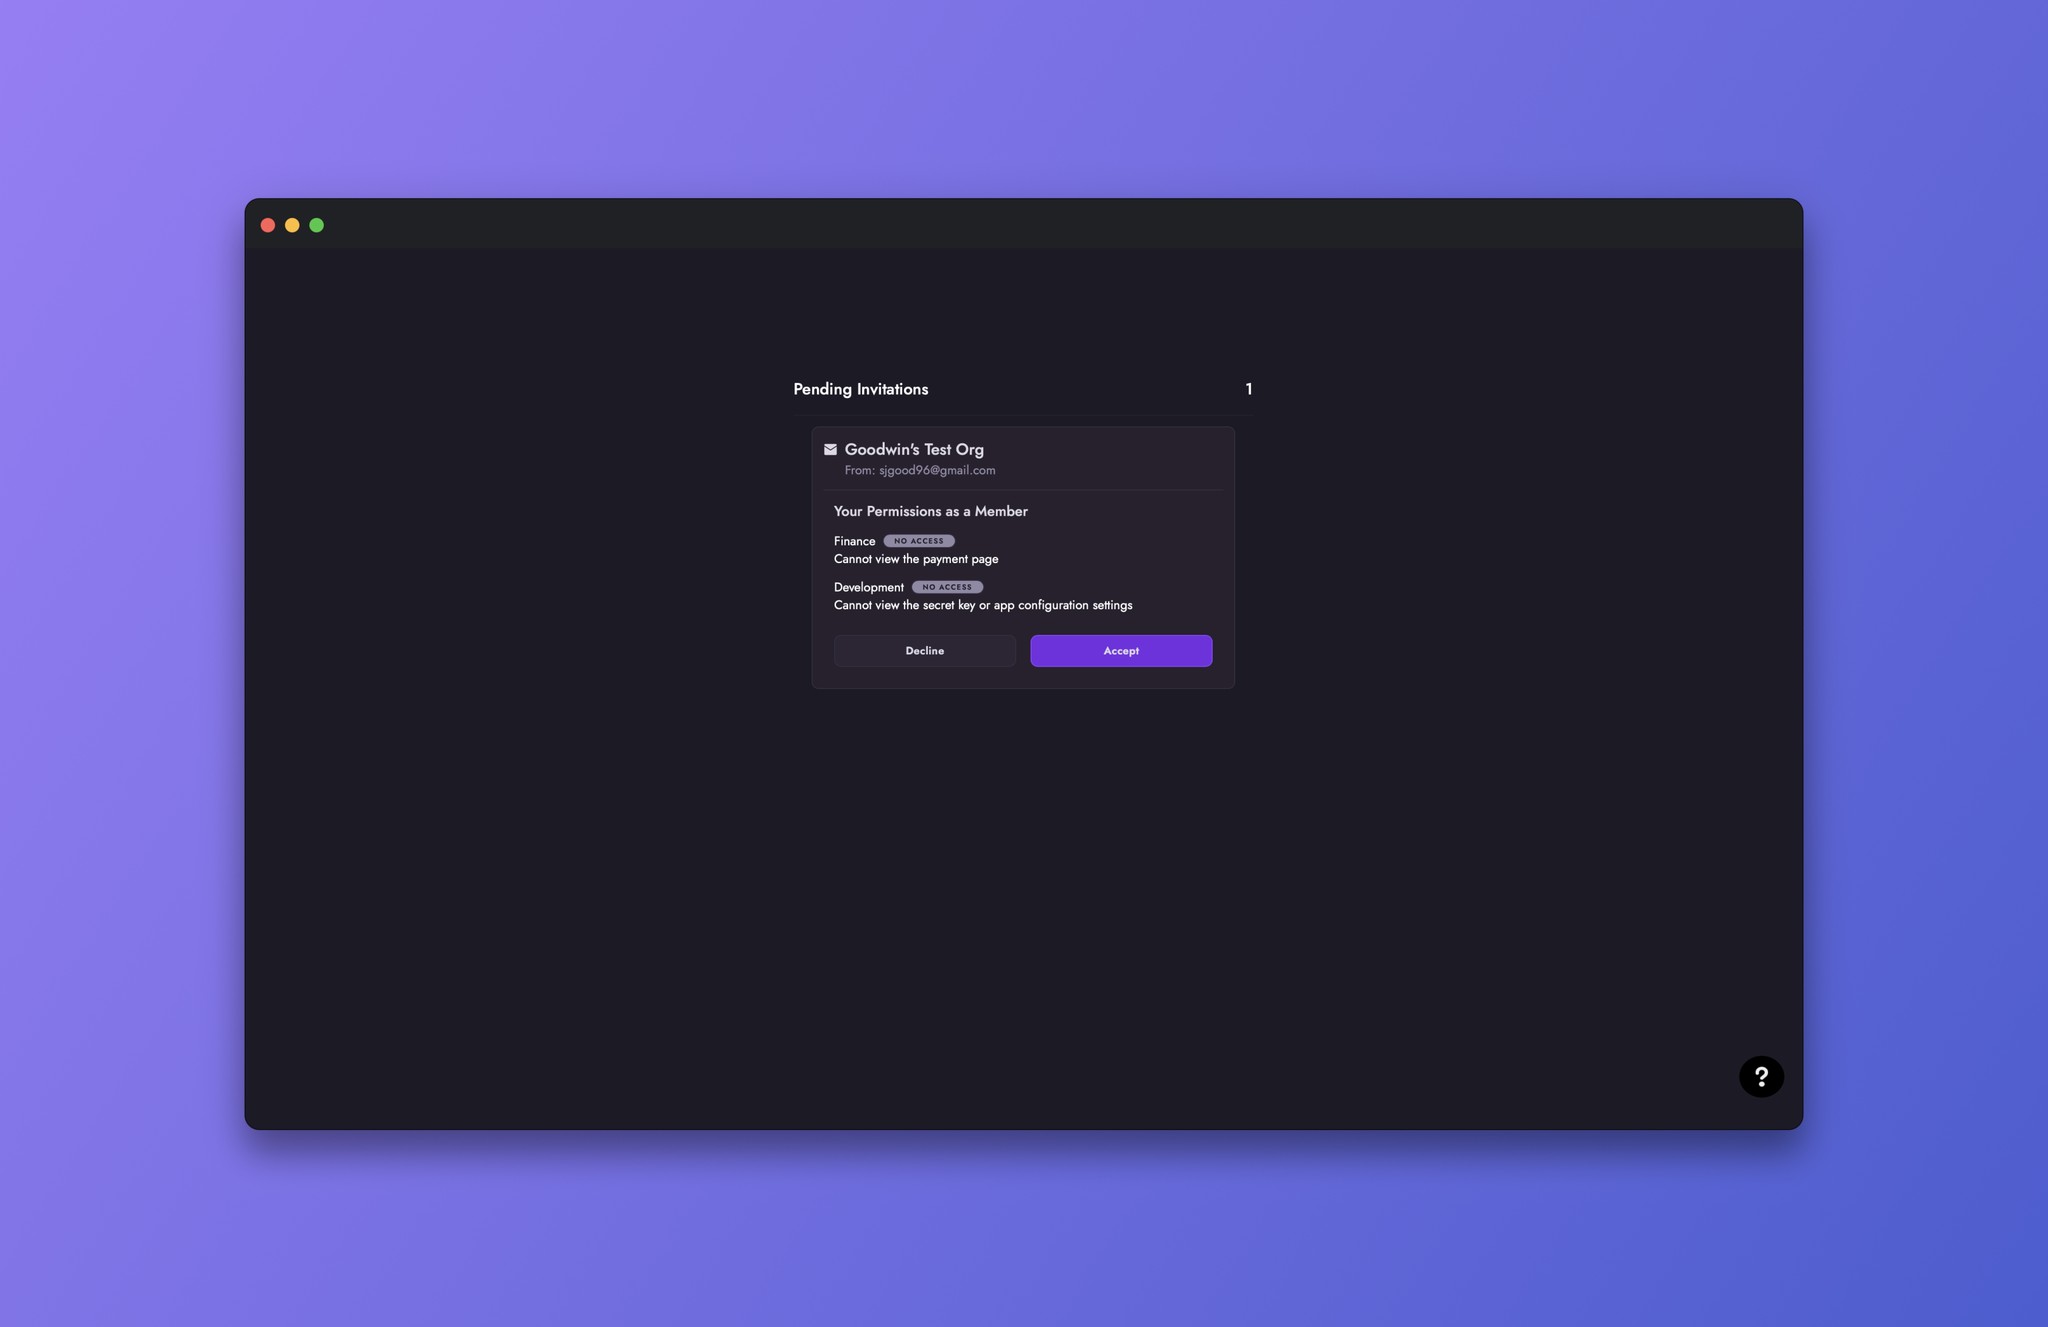
Once the Owner of the Organization sent the invites, they could view their pending invites and teammates who accepted the Member or Admin role by navigating to the Channel Settings. The Owner and Admins can add additional members by clicking the 'Add User' button.
How 'No Access' is displayed

How 'No Access' is displayed

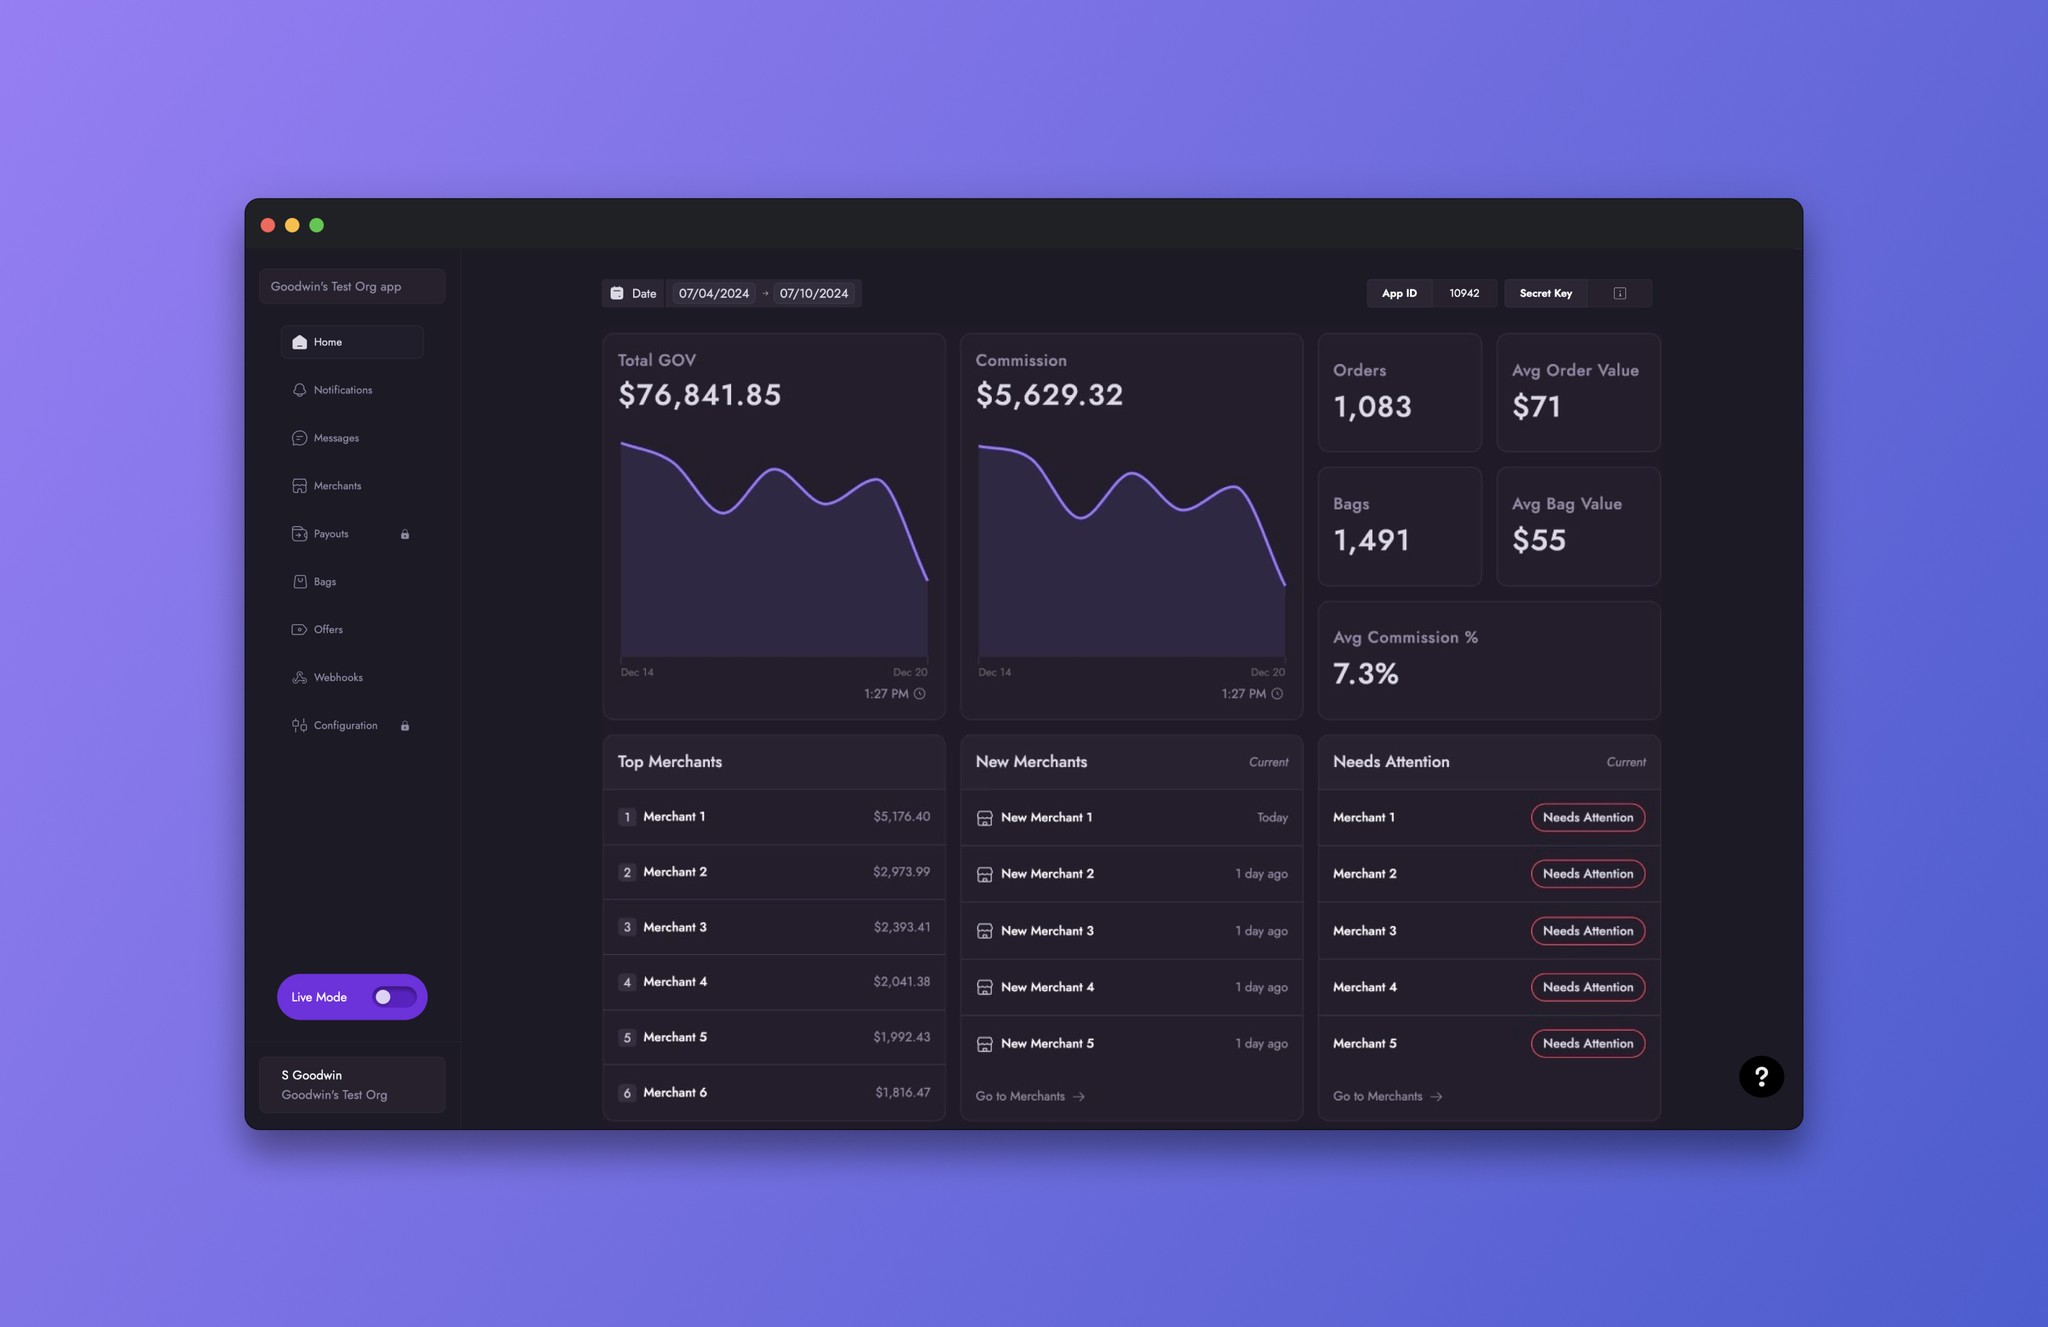
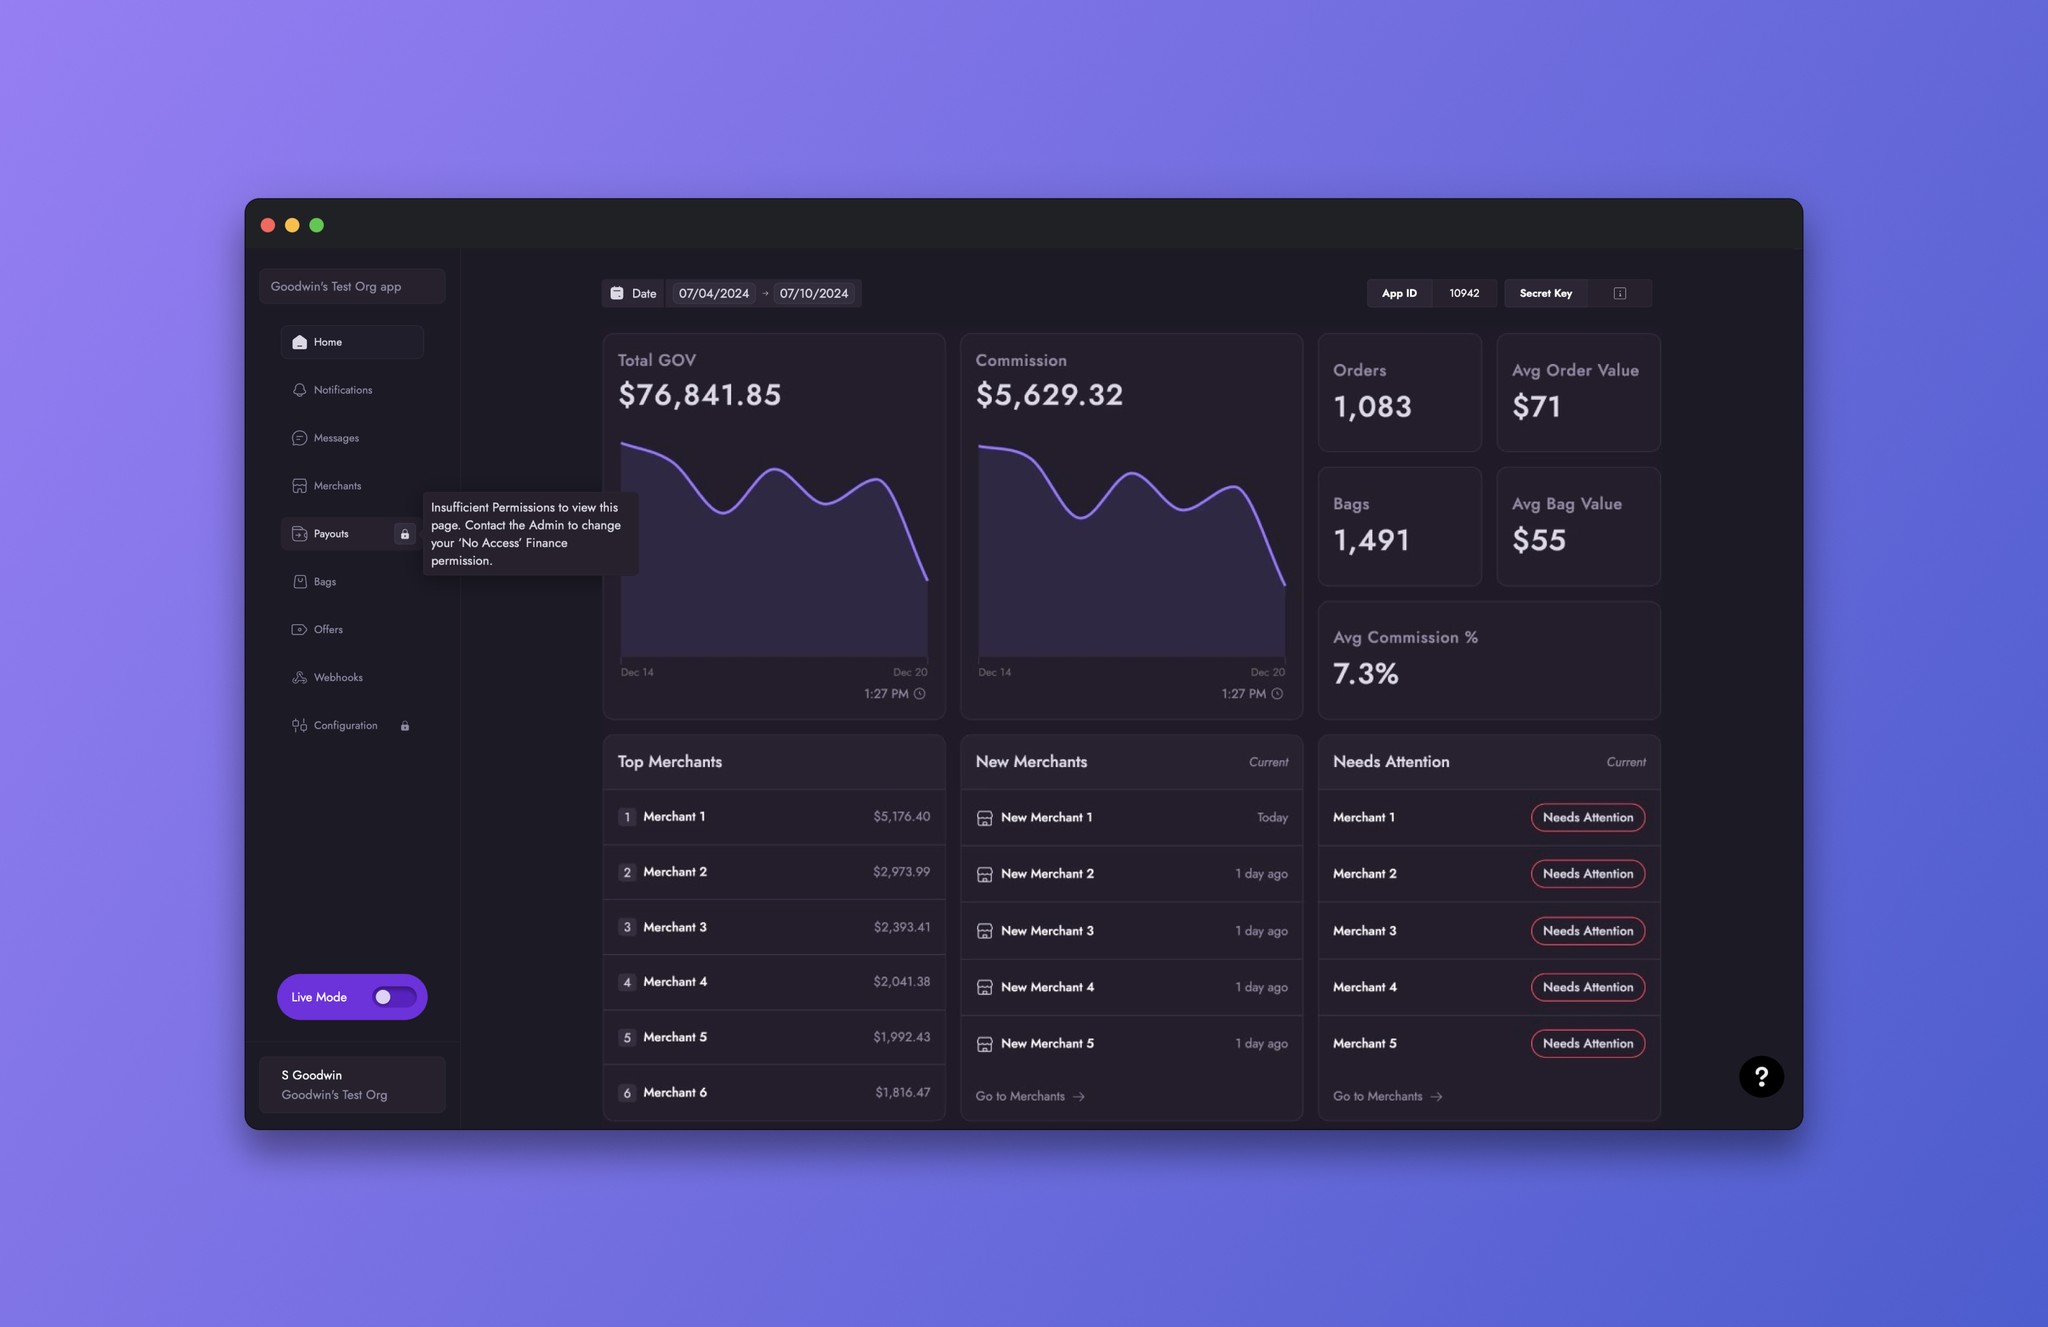
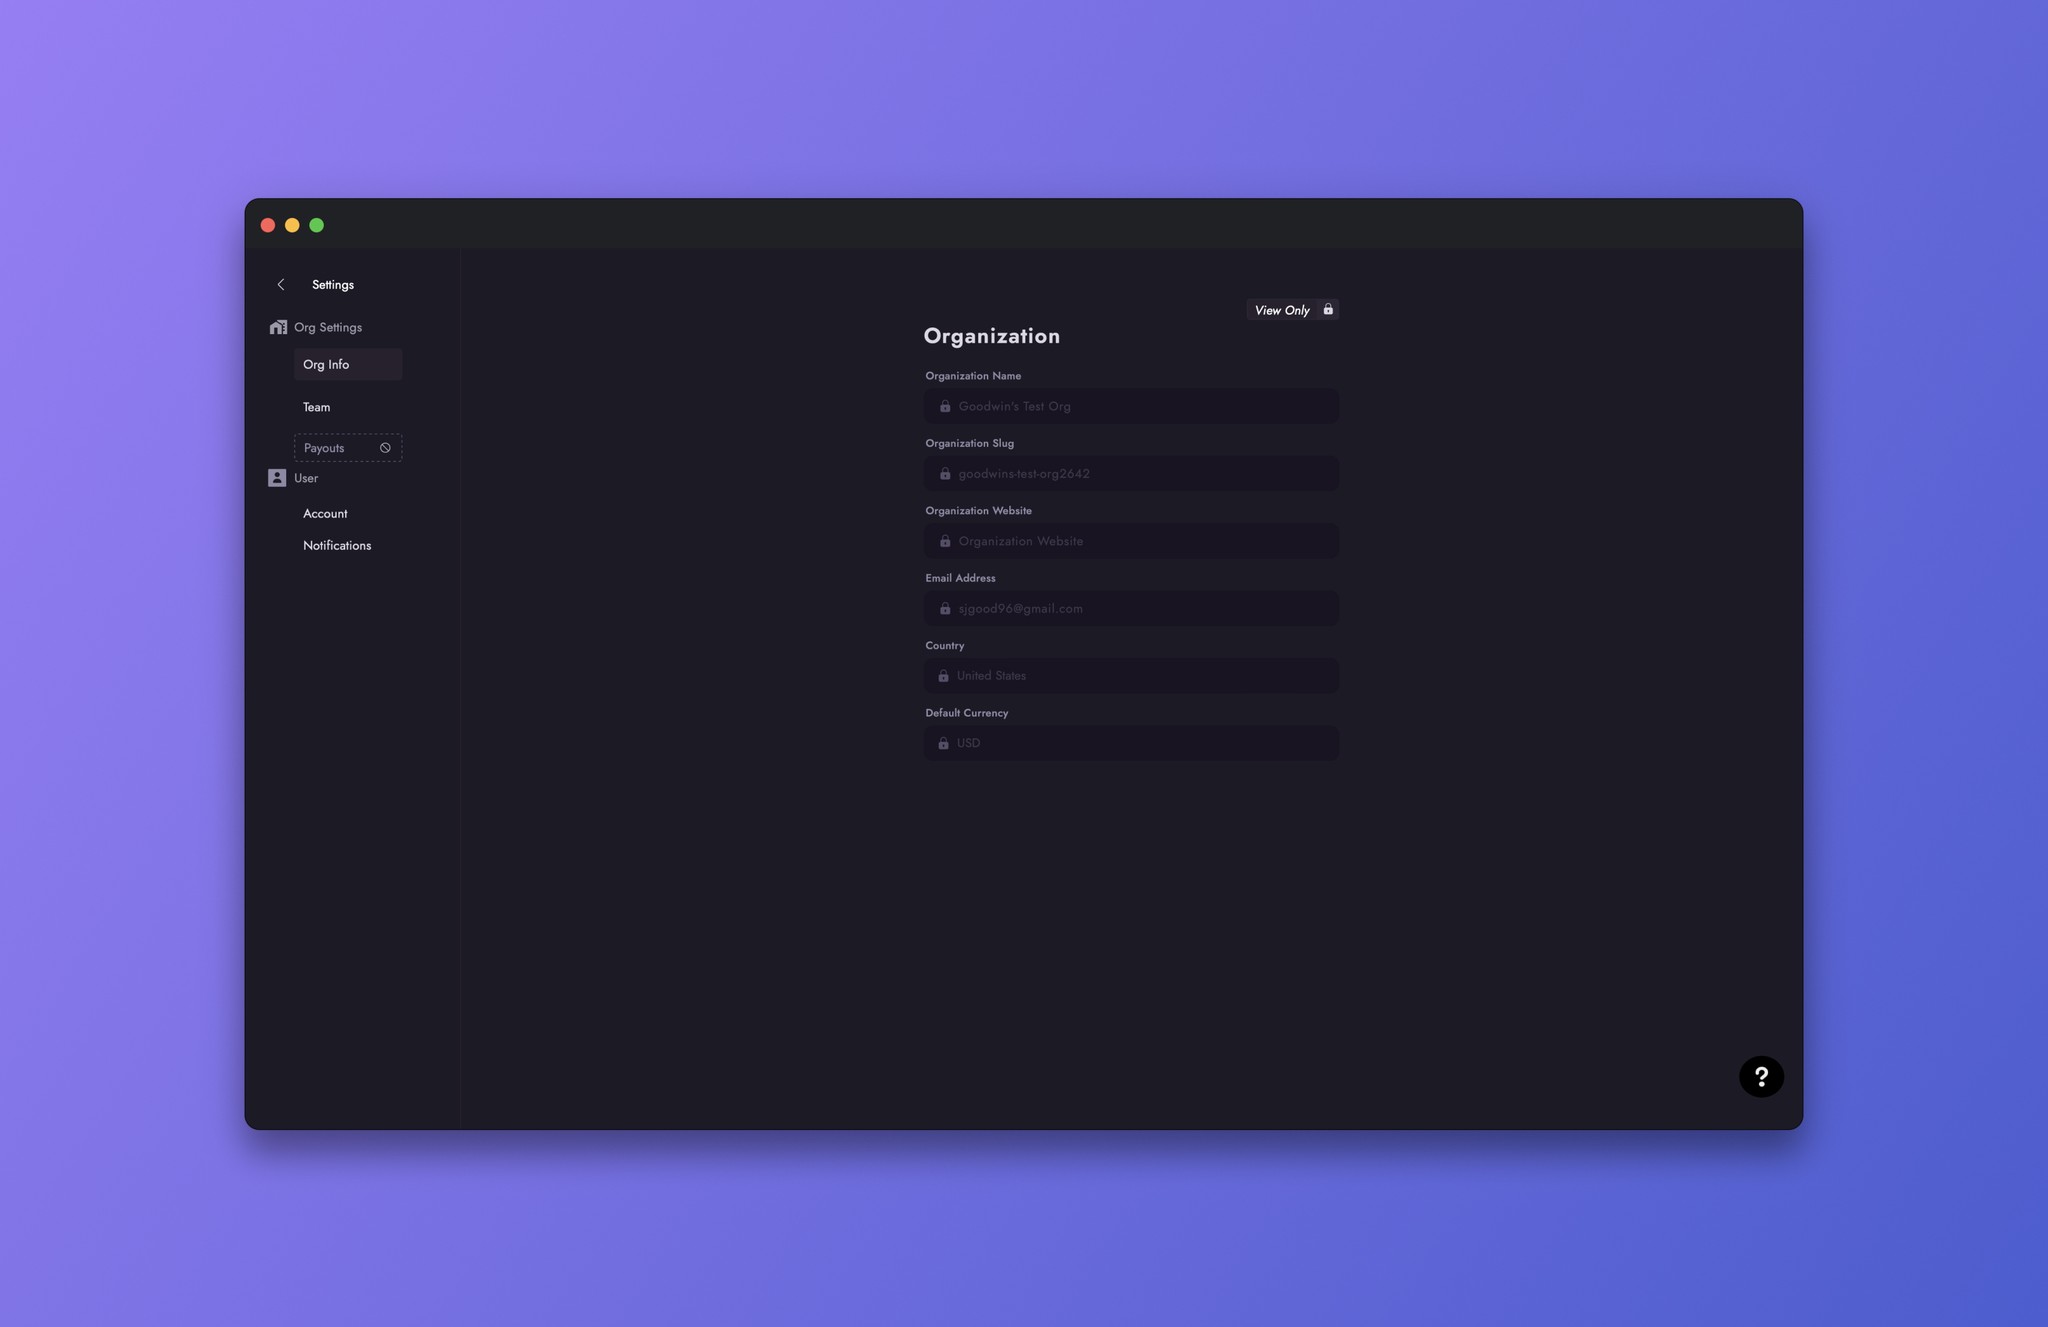
If a Member with 'No Access' permissions assigned for Payments and Configuration is set, the Dashboard's main navigation displays lock icons. The user can hover and then click on the lock icon to trigger a tooltip, informing them of their permissions.

If a Member with 'No Access' permissions assigned for Payments and Configuration is set, the Dashboard's main navigation displays lock icons. The user can hover and then click on the lock icon to trigger a tooltip, informing them of their permissions.

Outcome

Outcome

The addition of Organizations to the onboarding flow empowered Channel users to build robust teams of non-technical and technical teams of Members and Admins. This enhancement streamlined the process of team creation and management, making it easier for users to organize their teams effectively.

The addition of Organizations to the onboarding flow empowered Channel users to build robust teams of non-technical and technical teams of Members and Admins. This enhancement streamlined the process of team creation and management, making it easier for users to organize their teams effectively.

Up Next!

Home

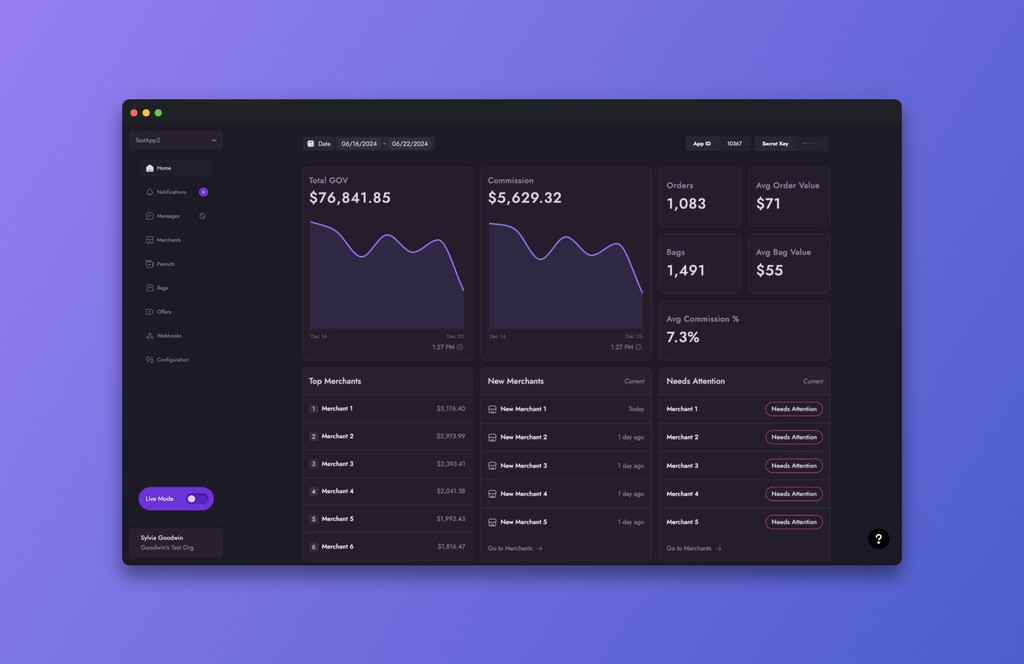
Home tab provides an overview of the users violet performance.

Up Next!

Home

Home tab provides an overview of the users violet performance.

Up Next!

Home

Home tab provides an overview of the users violet performance.

How 'No Access' is displayed

If a Member with 'No Access' permissions assigned for Payments and Configuration is set, the Dashboard's main navigation displays lock icons. The user can hover and then click on the lock icon to trigger a tooltip, informing them of their permissions.

Up Next!

Home

Home tab provides an overview of the users violet performance.

Outcome

If a Member with 'No Access' permissions assigned for Payments and Configuration is set, the Dashboard's main navigation displays lock icons. The user can hover and then click on the lock icon to trigger a tooltip, informing them of their permissions.