#onboardingtool
#web
#Figma
Violet Connect
Violet Connect
Violet Connect
Violet Connect
Violet Connect
Violet Connect
Violet Connect is an onboarding tool that you can use to securely and safely onboard merchants onto your marketplace experience with ease.
Violet Connect is an onboarding tool that you can use to securely and safely onboard merchants onto your marketplace experience with ease.
Violet Connect is an onboarding tool that you can use to securely and safely onboard merchants onto your marketplace experience with ease.
Violet Connect is an onboarding tool that you can use to securely and safely onboard merchants onto your marketplace experience with ease.
Violet Connect is an onboarding tool that you can use to securely and safely onboard merchants onto your marketplace experience with ease.
Violet Connect is an onboarding tool that you can use to securely and safely onboard merchants onto your marketplace experience with ease.


Violet.io
Company
Sole Product Designer
Role
Violet.io
Company
Sole Product Designer
Role
User flow, step by step
Step 1
Select platform
Select platform
Select platform
Step 2
Enter your Store URL
Enter your Store URL
Enter your Store URL
Step 3
Enter Credentials
Enter Credentials
Enter Credentials
Step 4
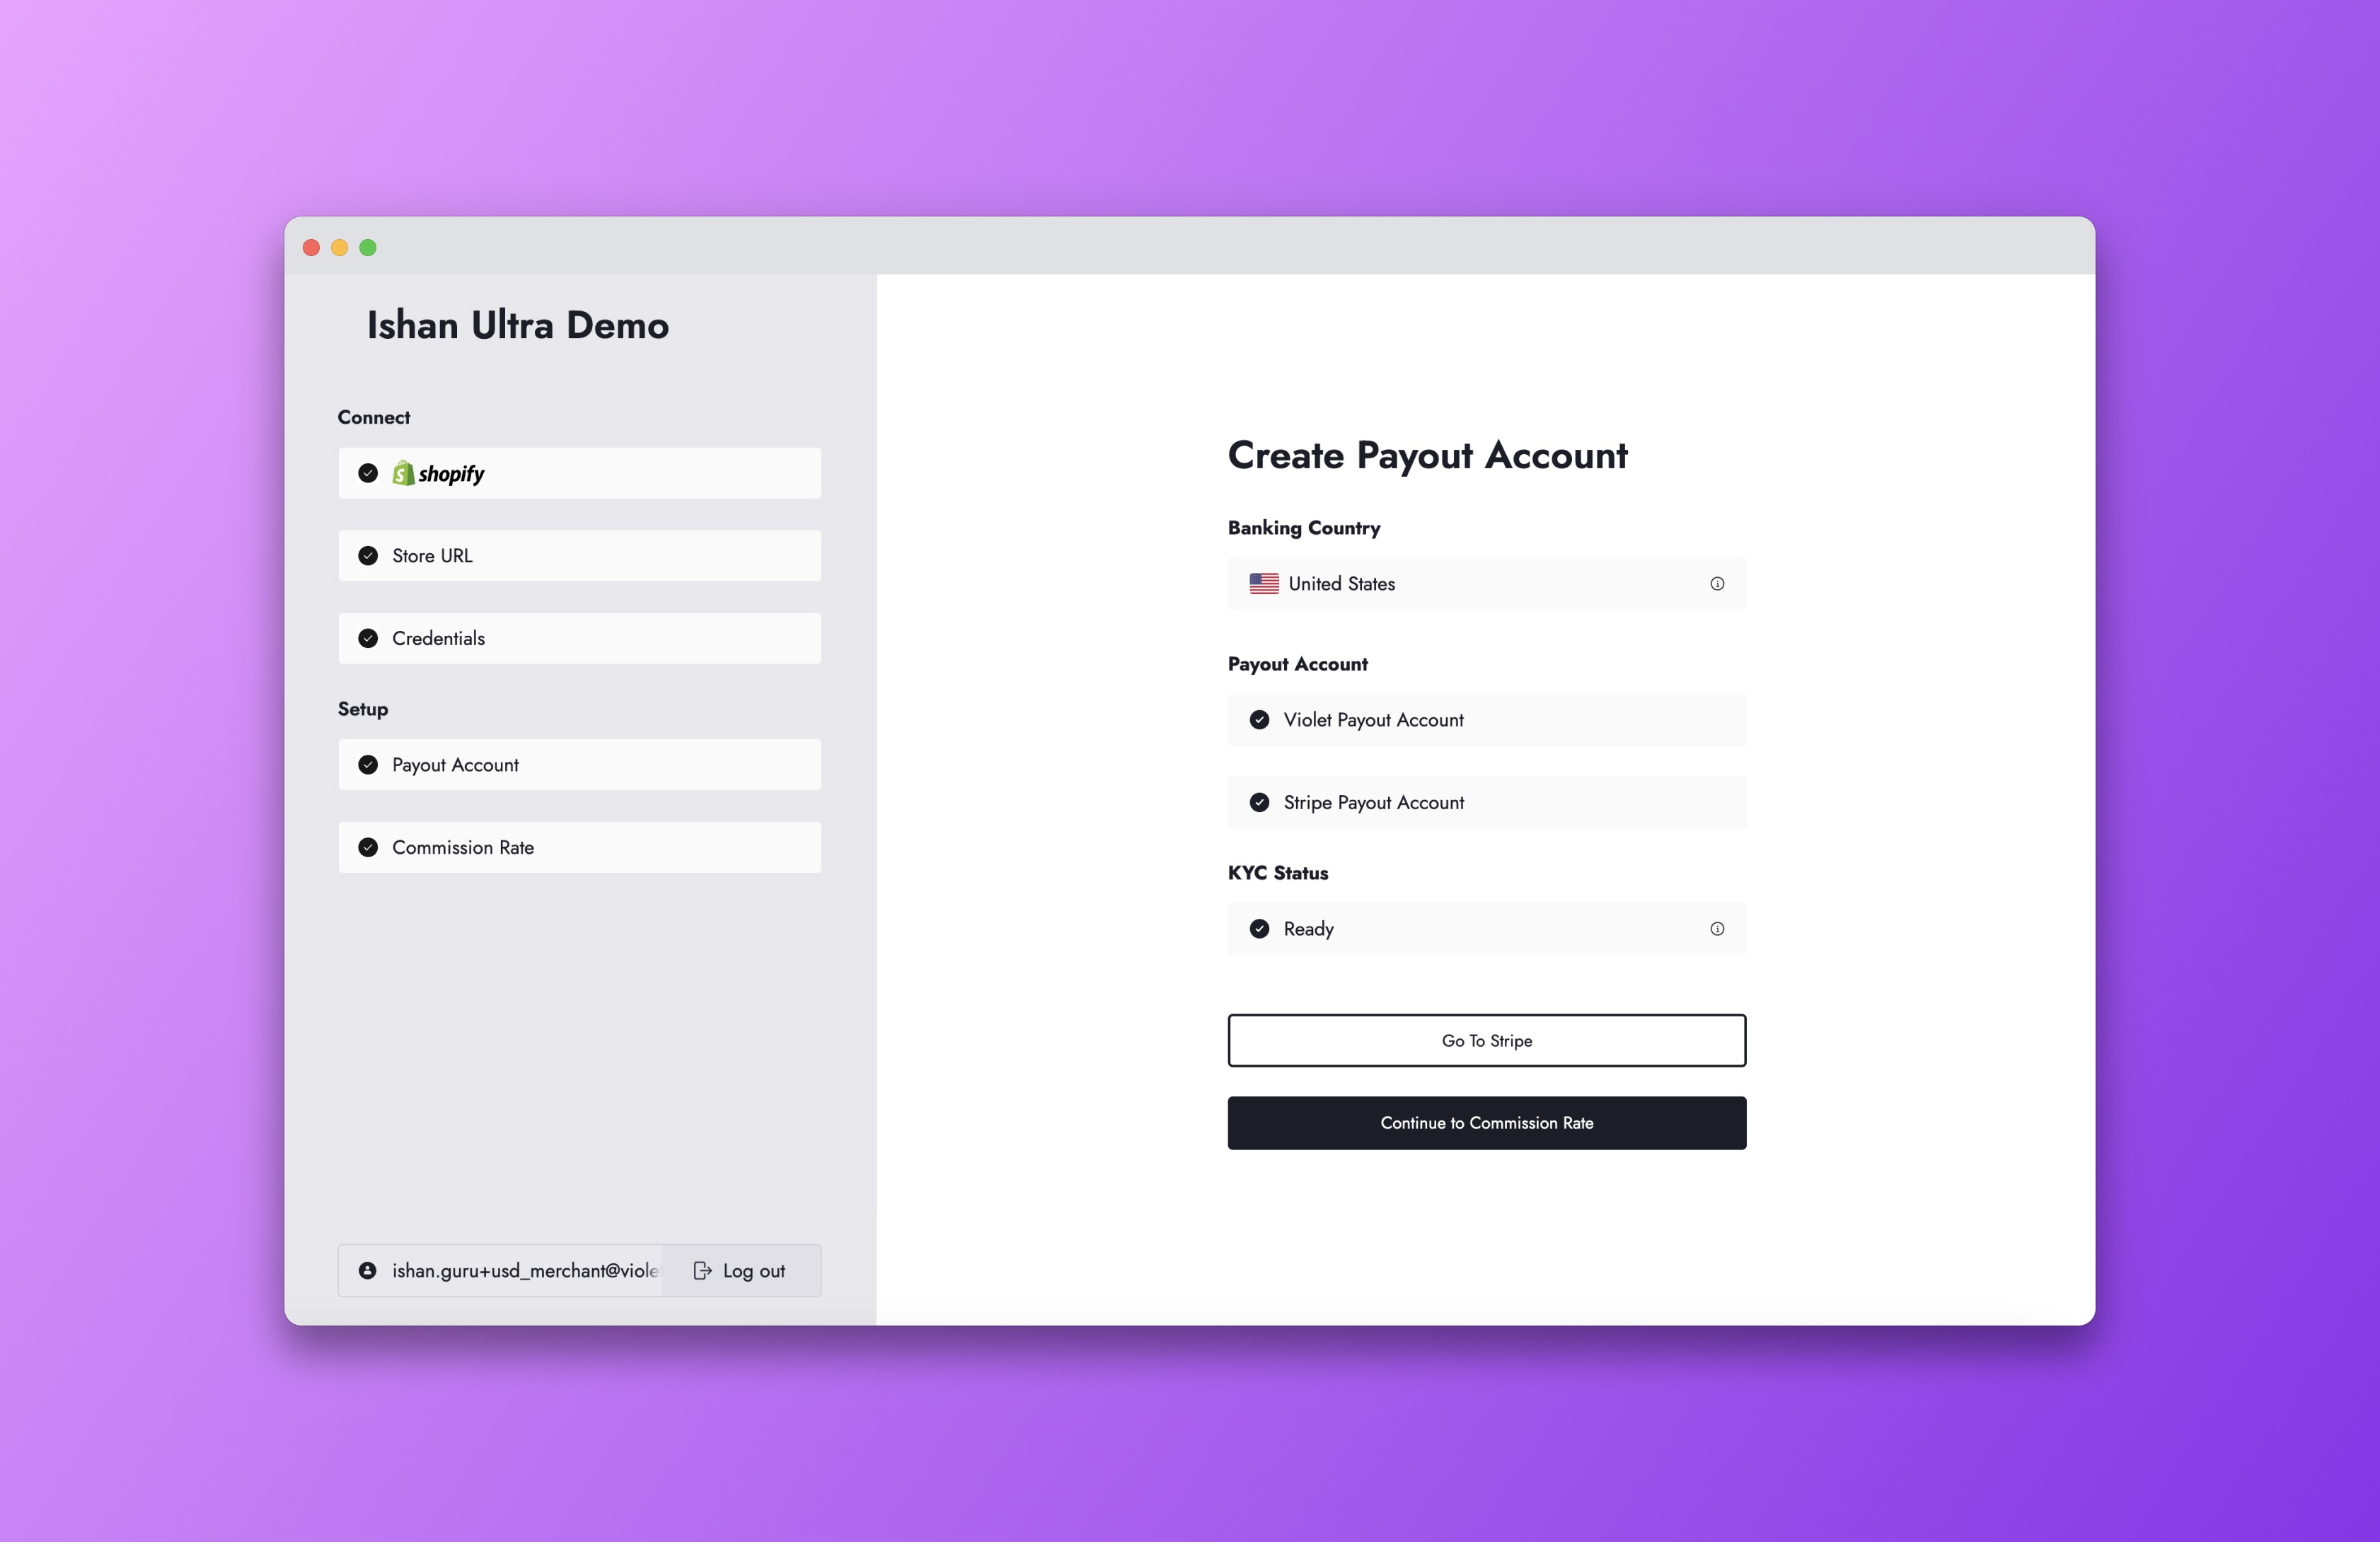
Create Payout Account
Create Payout Account
Create Payout Account
Step 5
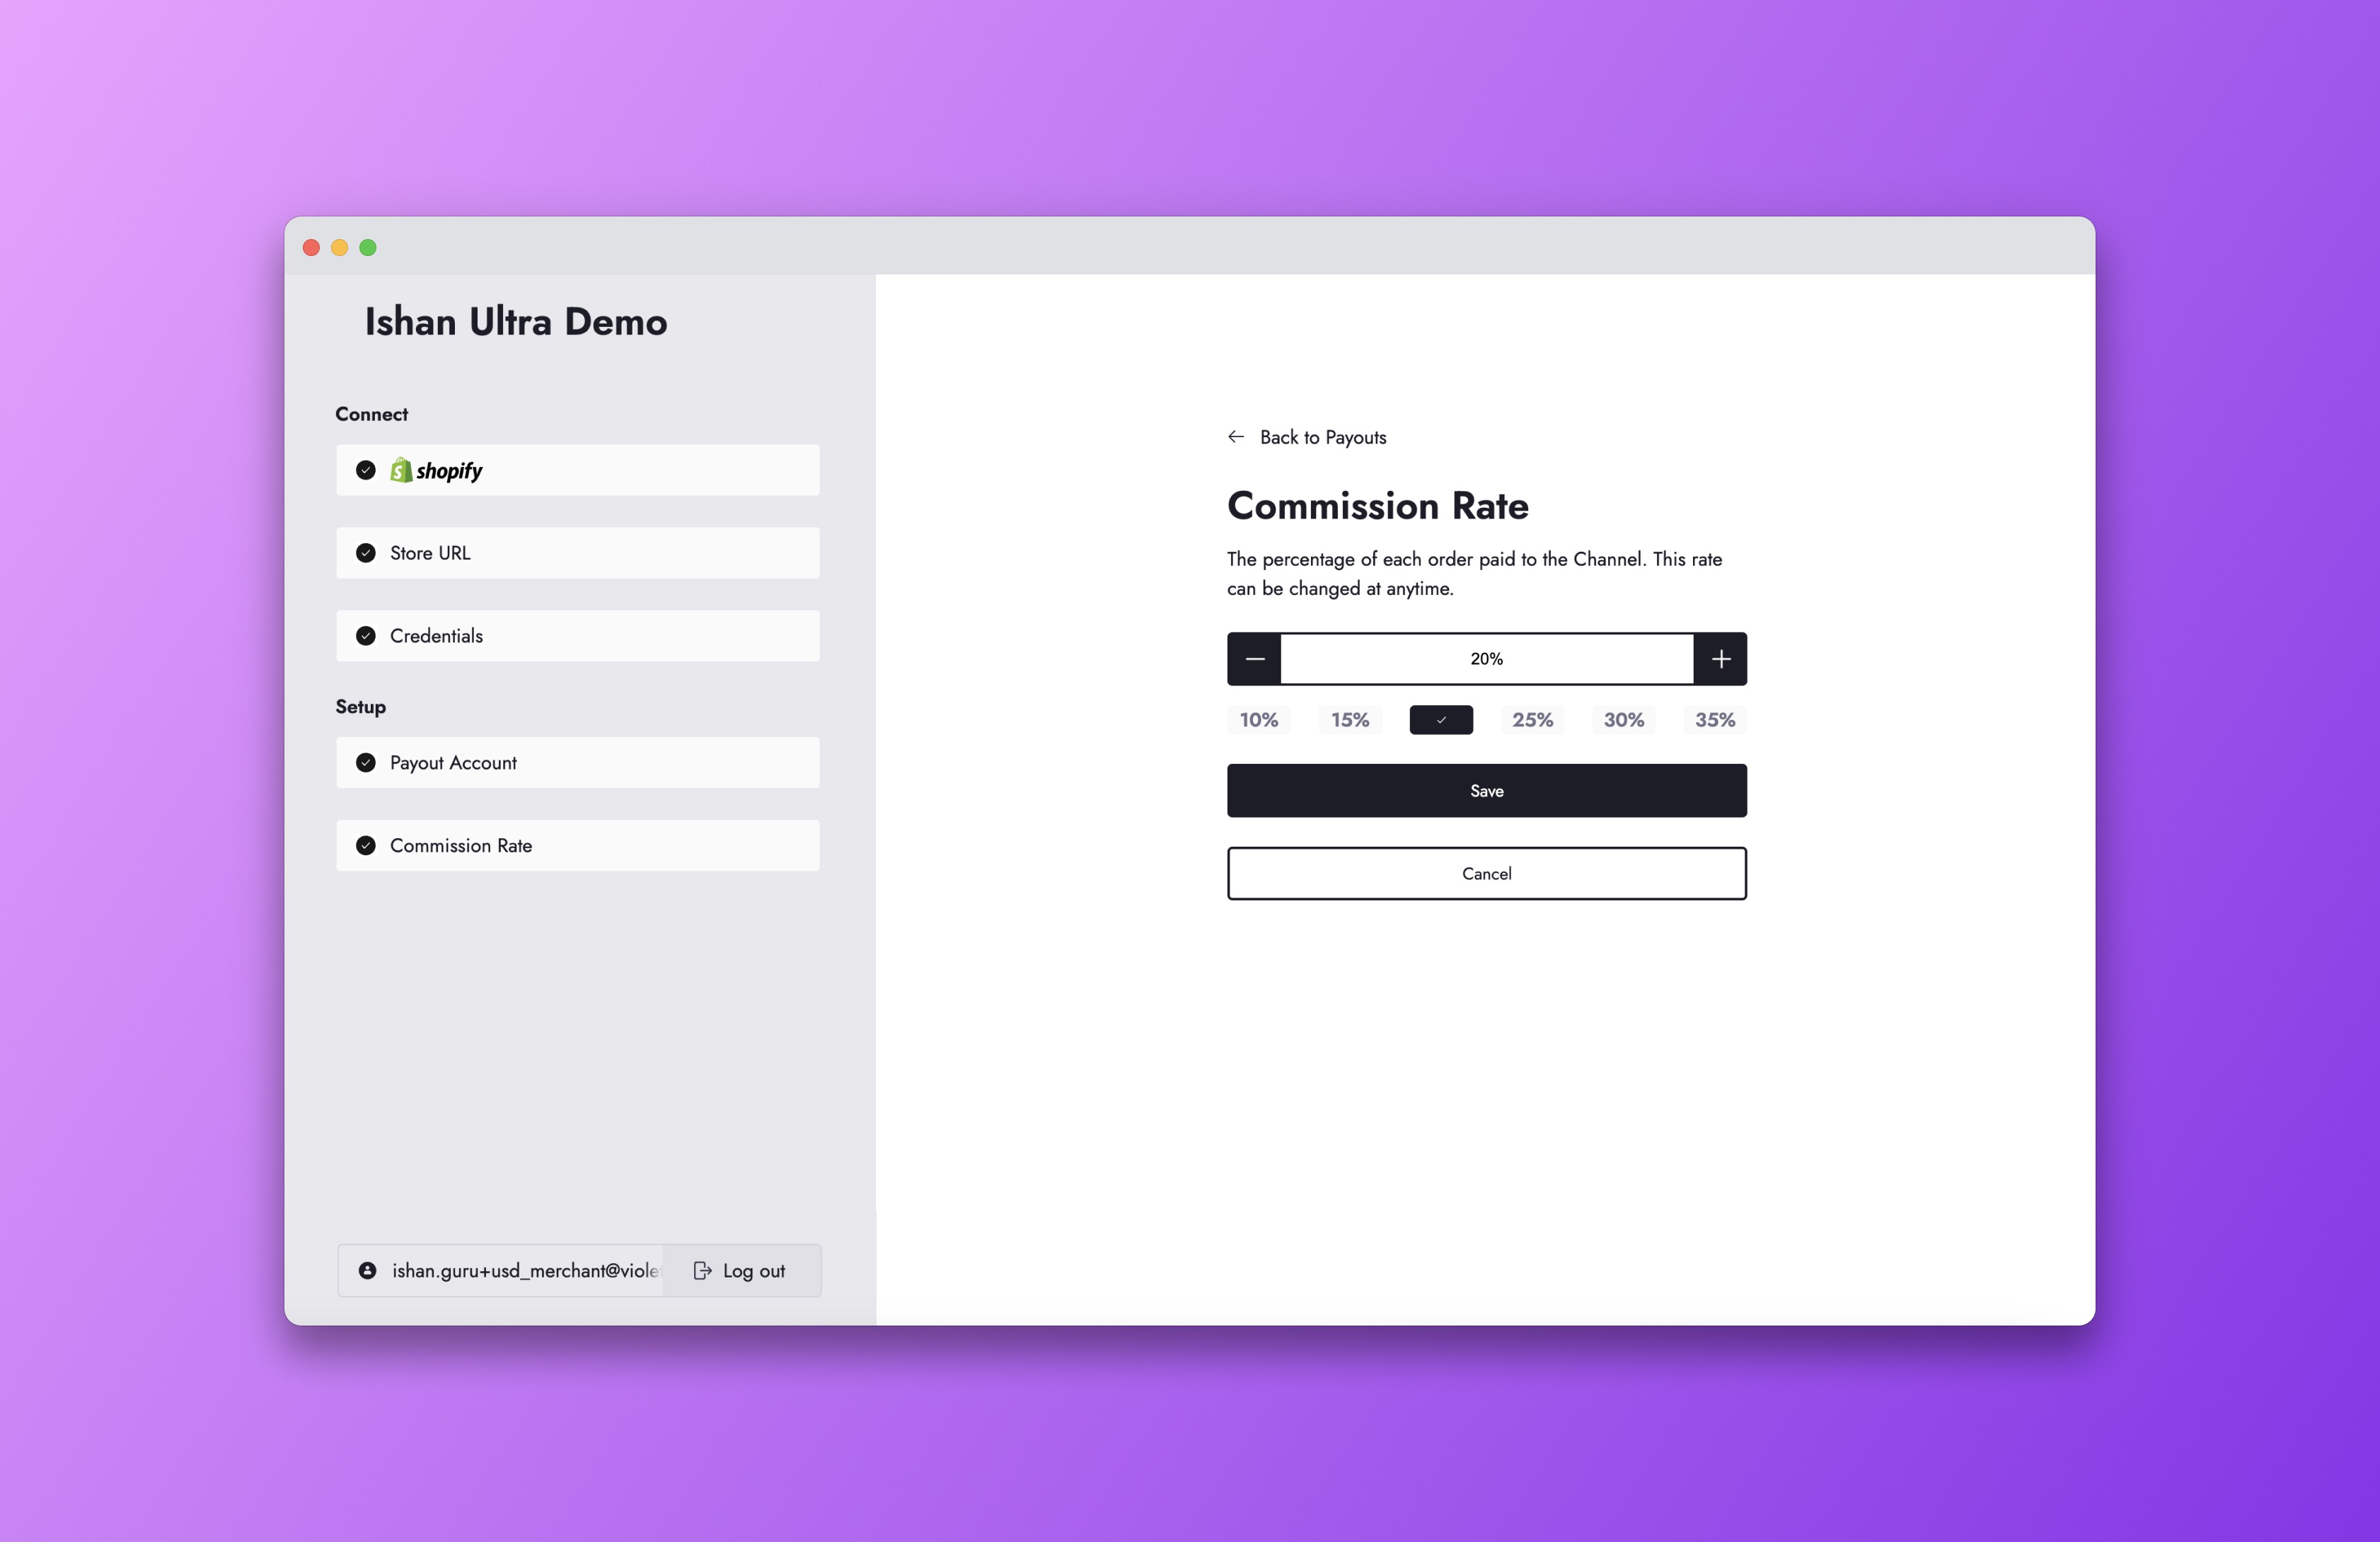
Commission Rate
Commission Rate
Commission Rate
Step 6
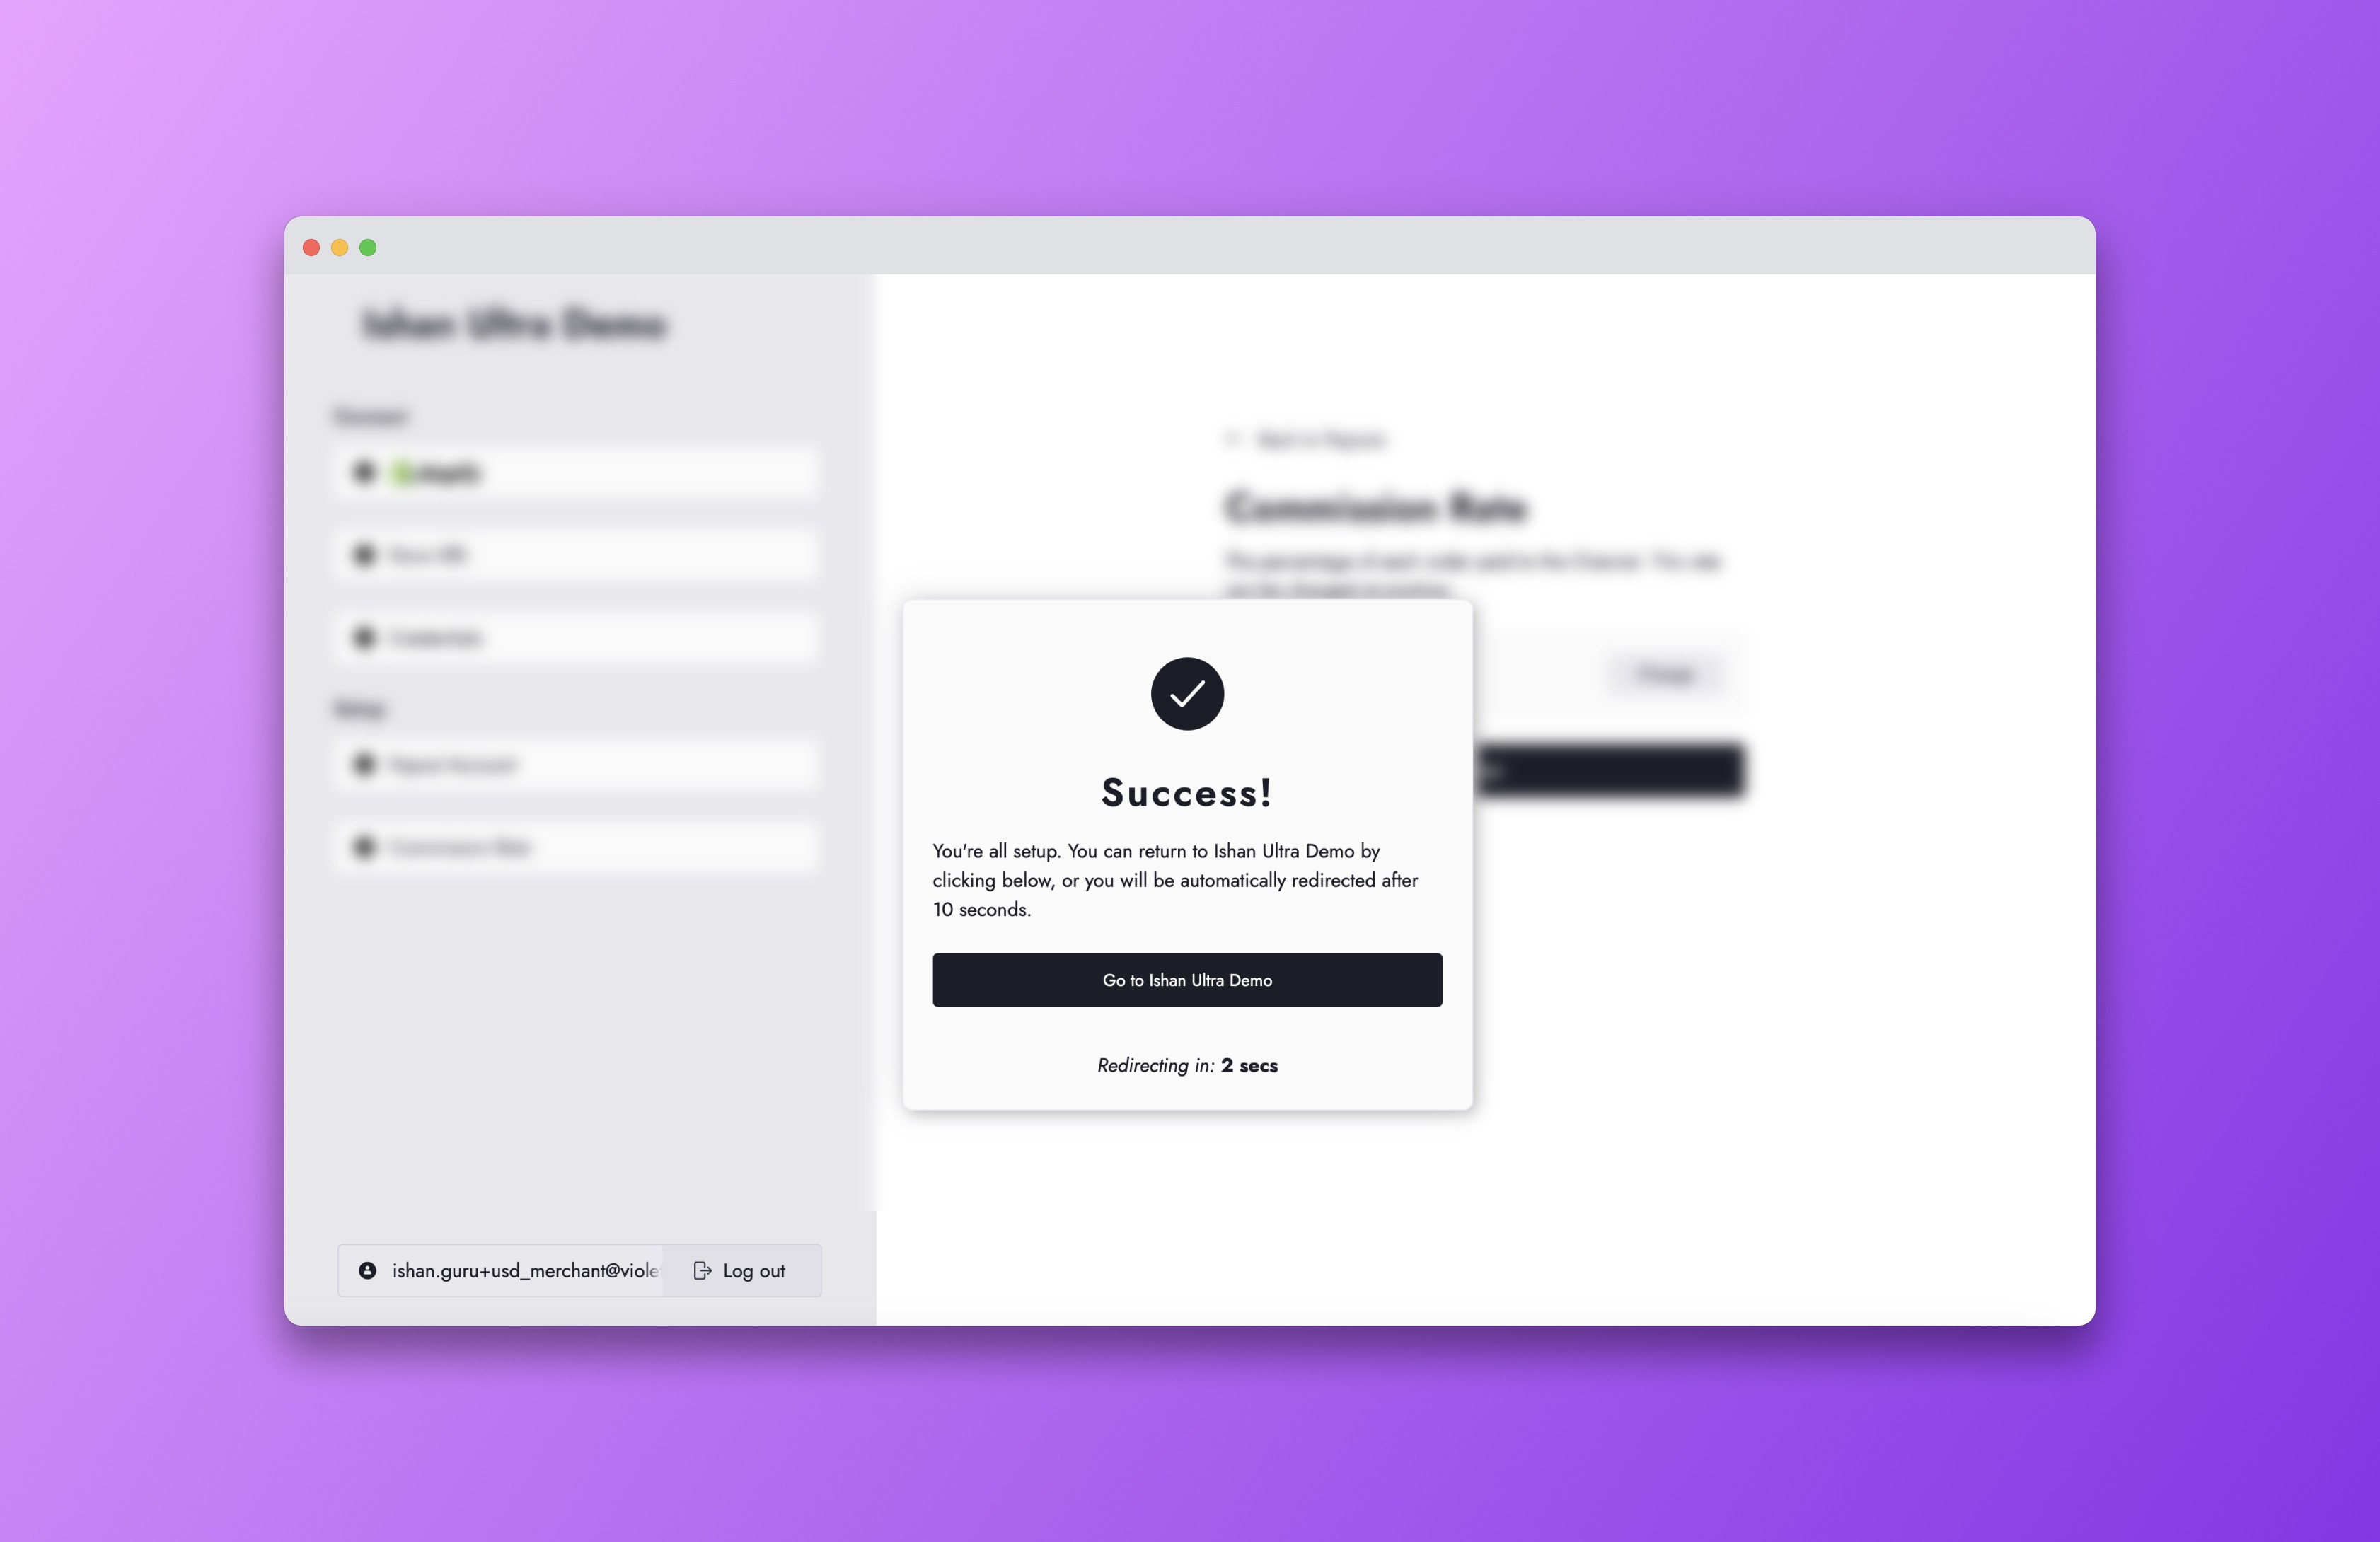
Success!
Success!
Success!
Step 1
Step 1
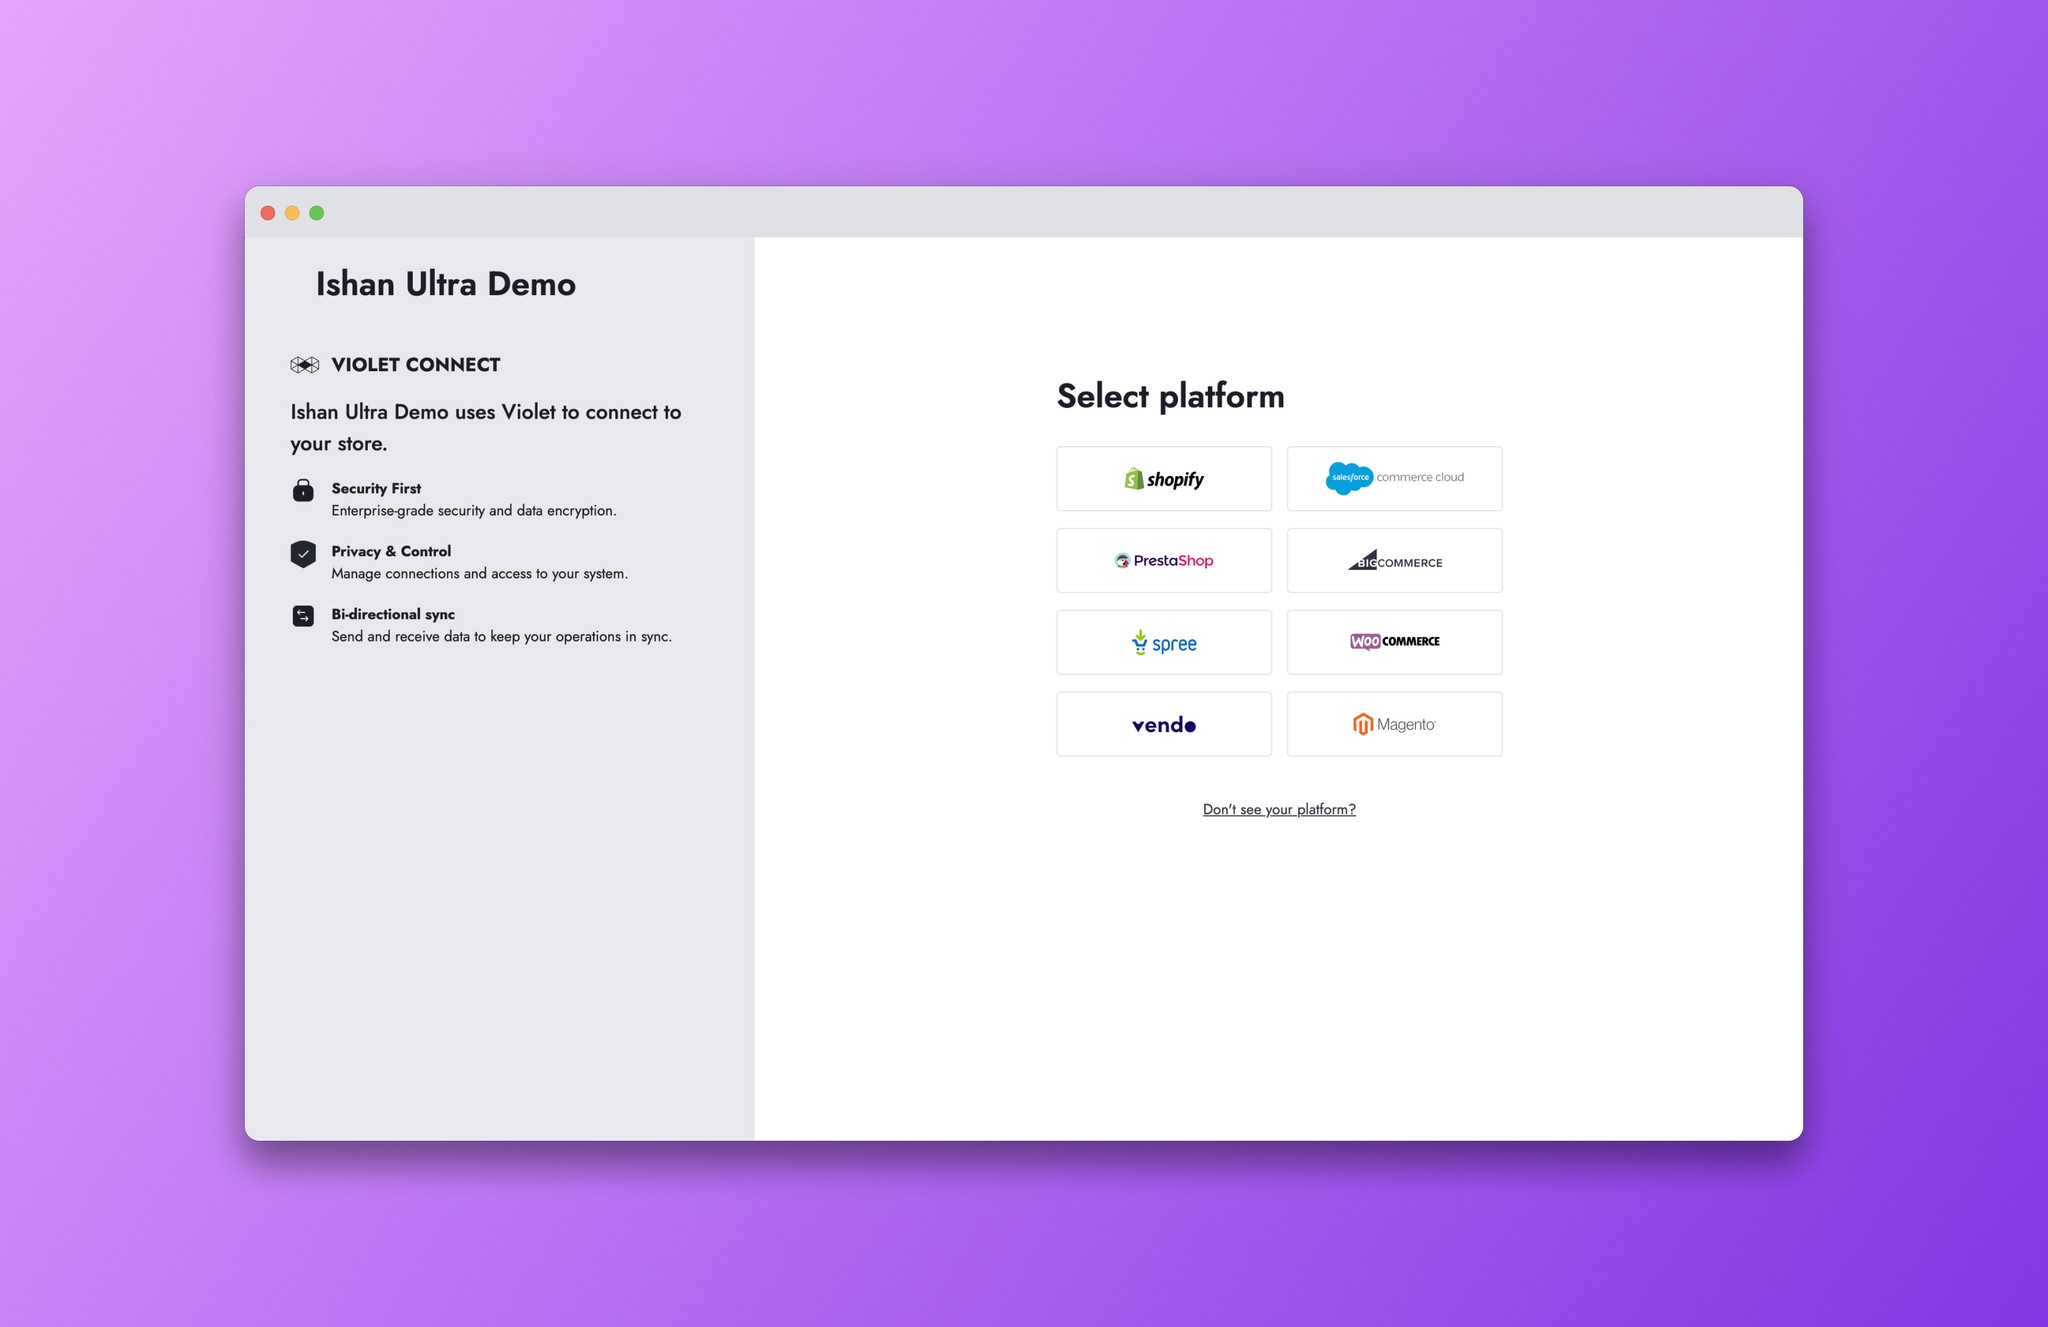
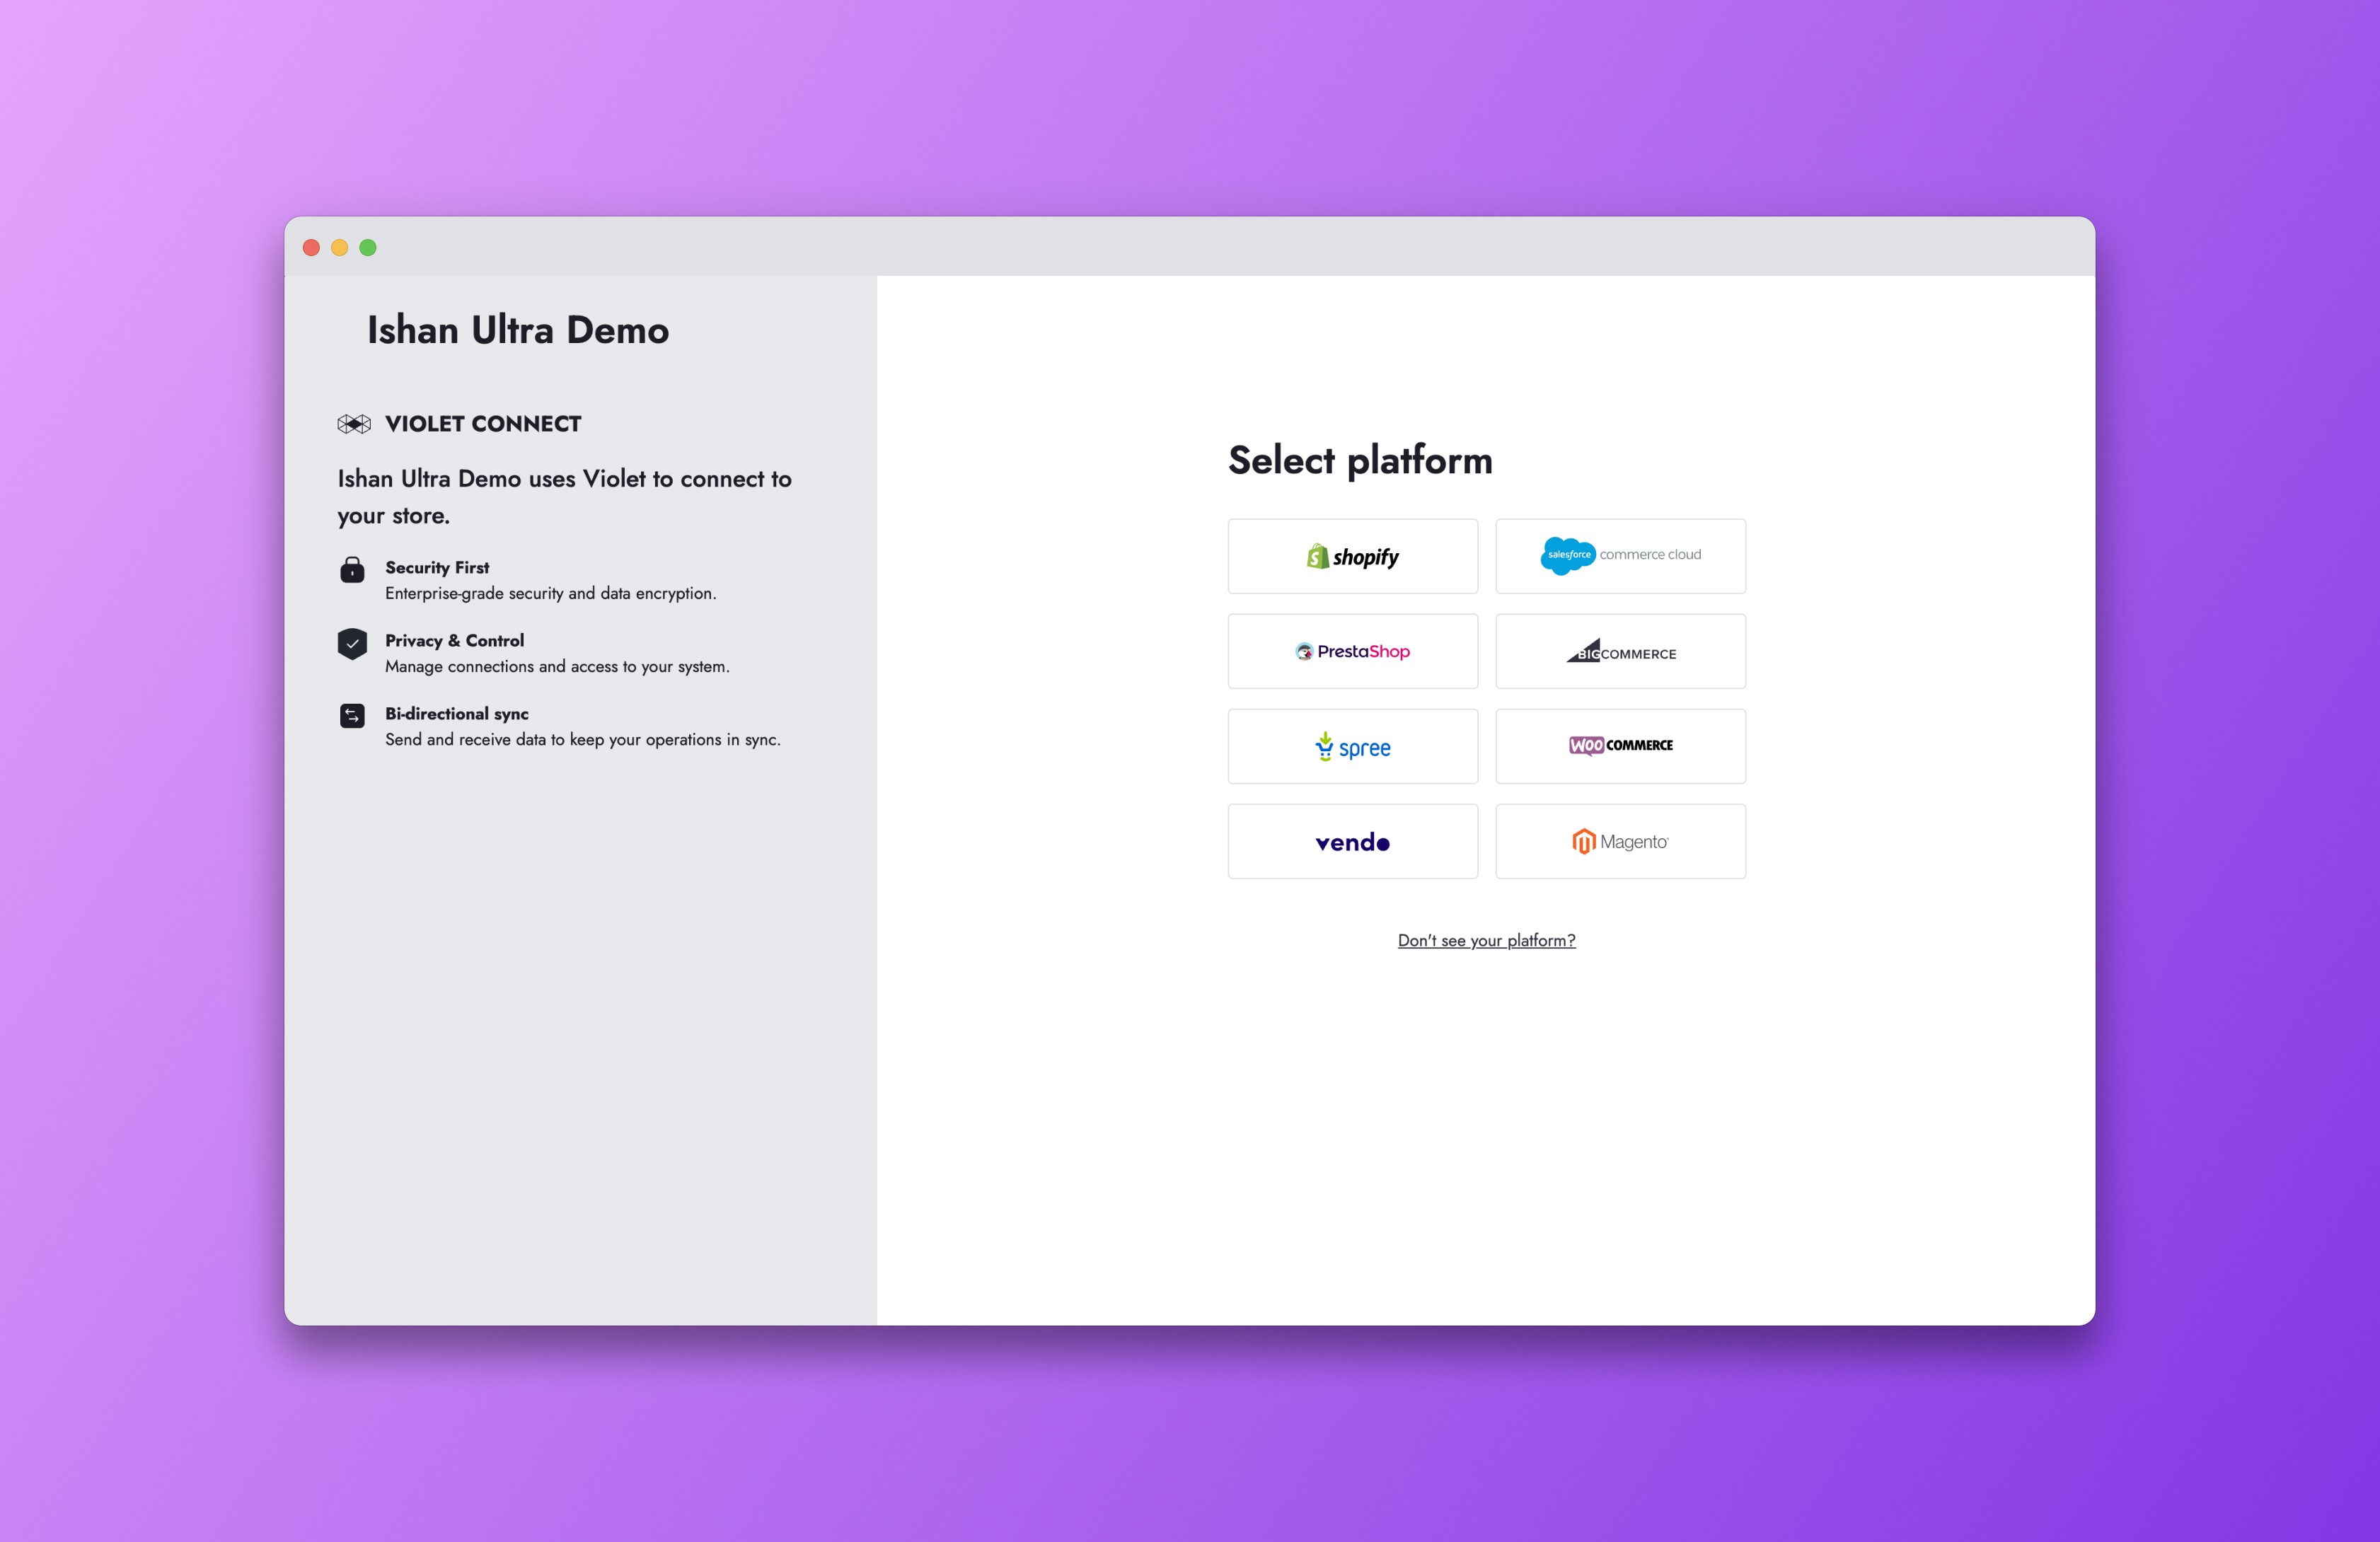
Once signed in, the merchant needs to select the e-commerce platform that their store is hosted on. Each platform will have a different set of credential requirements.
Once signed in, the merchant needs to select the e-commerce platform that their store is hosted on. Each platform will have a different set of credential requirements.


Step 2
Step 2
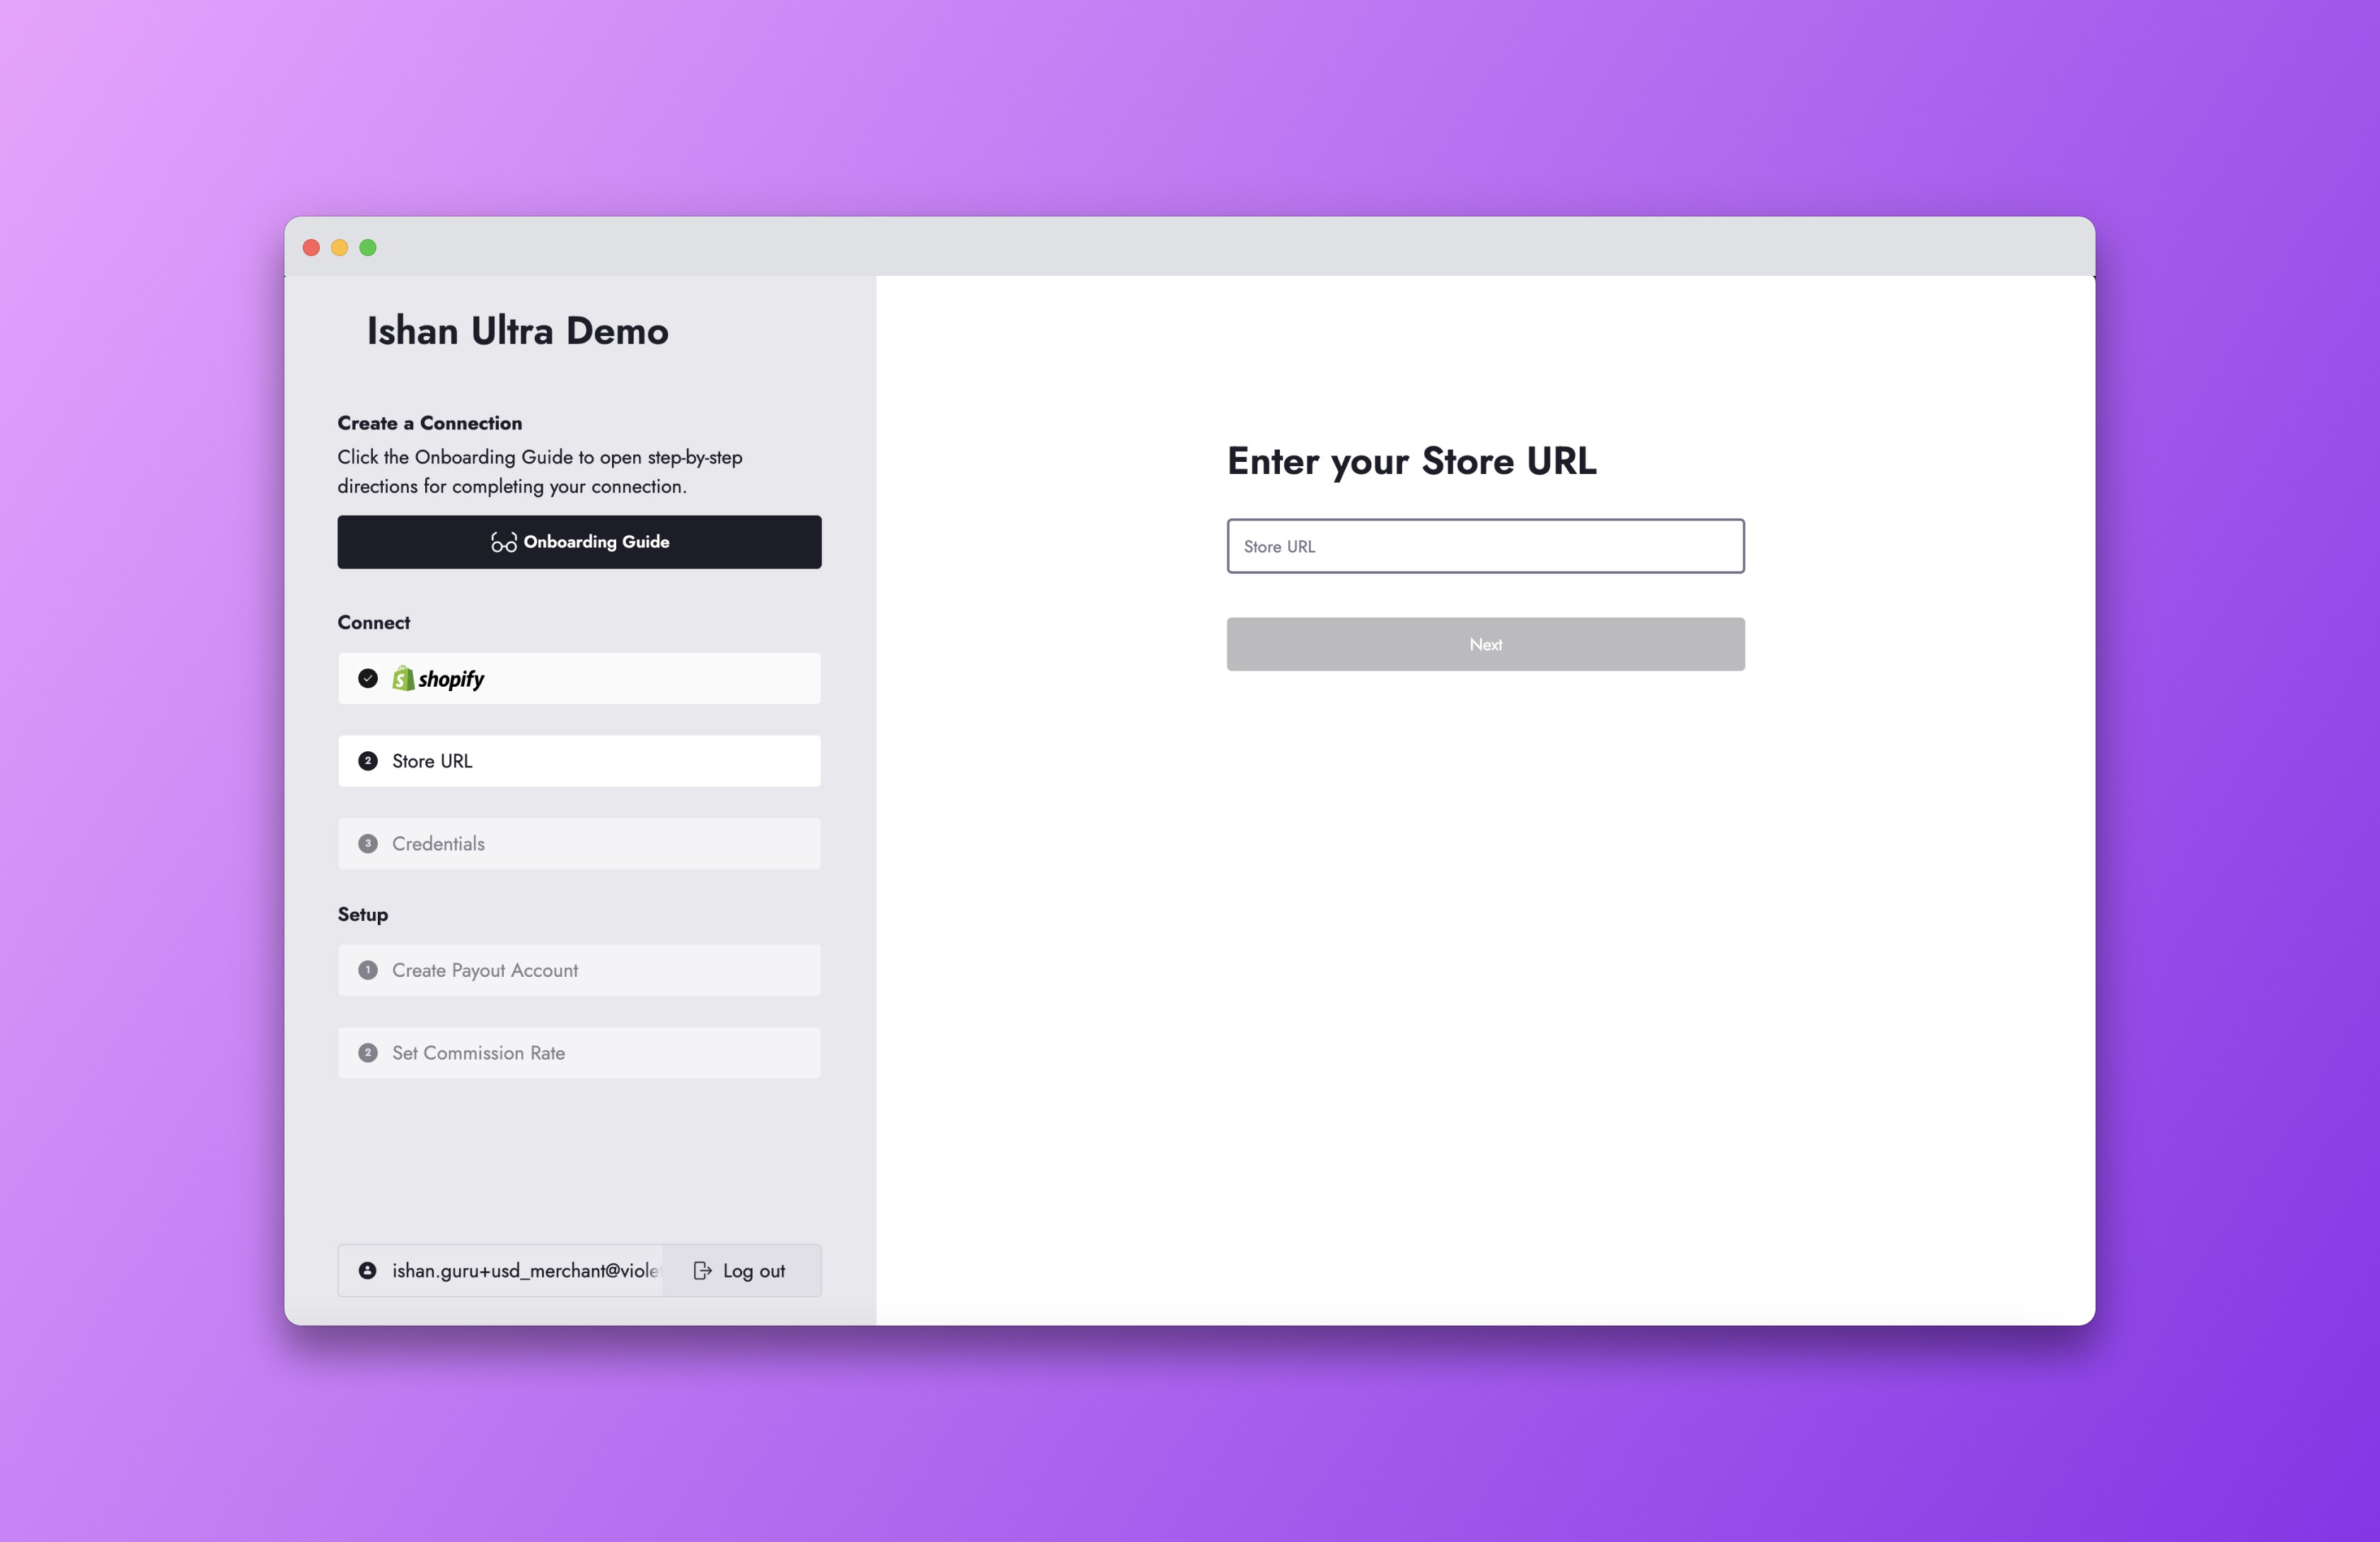
Depending on the platform, the merchant will then need to enter their Store URL.
Depending on the platform, the merchant will then need to enter their Store URL.


Step 3
Step 3
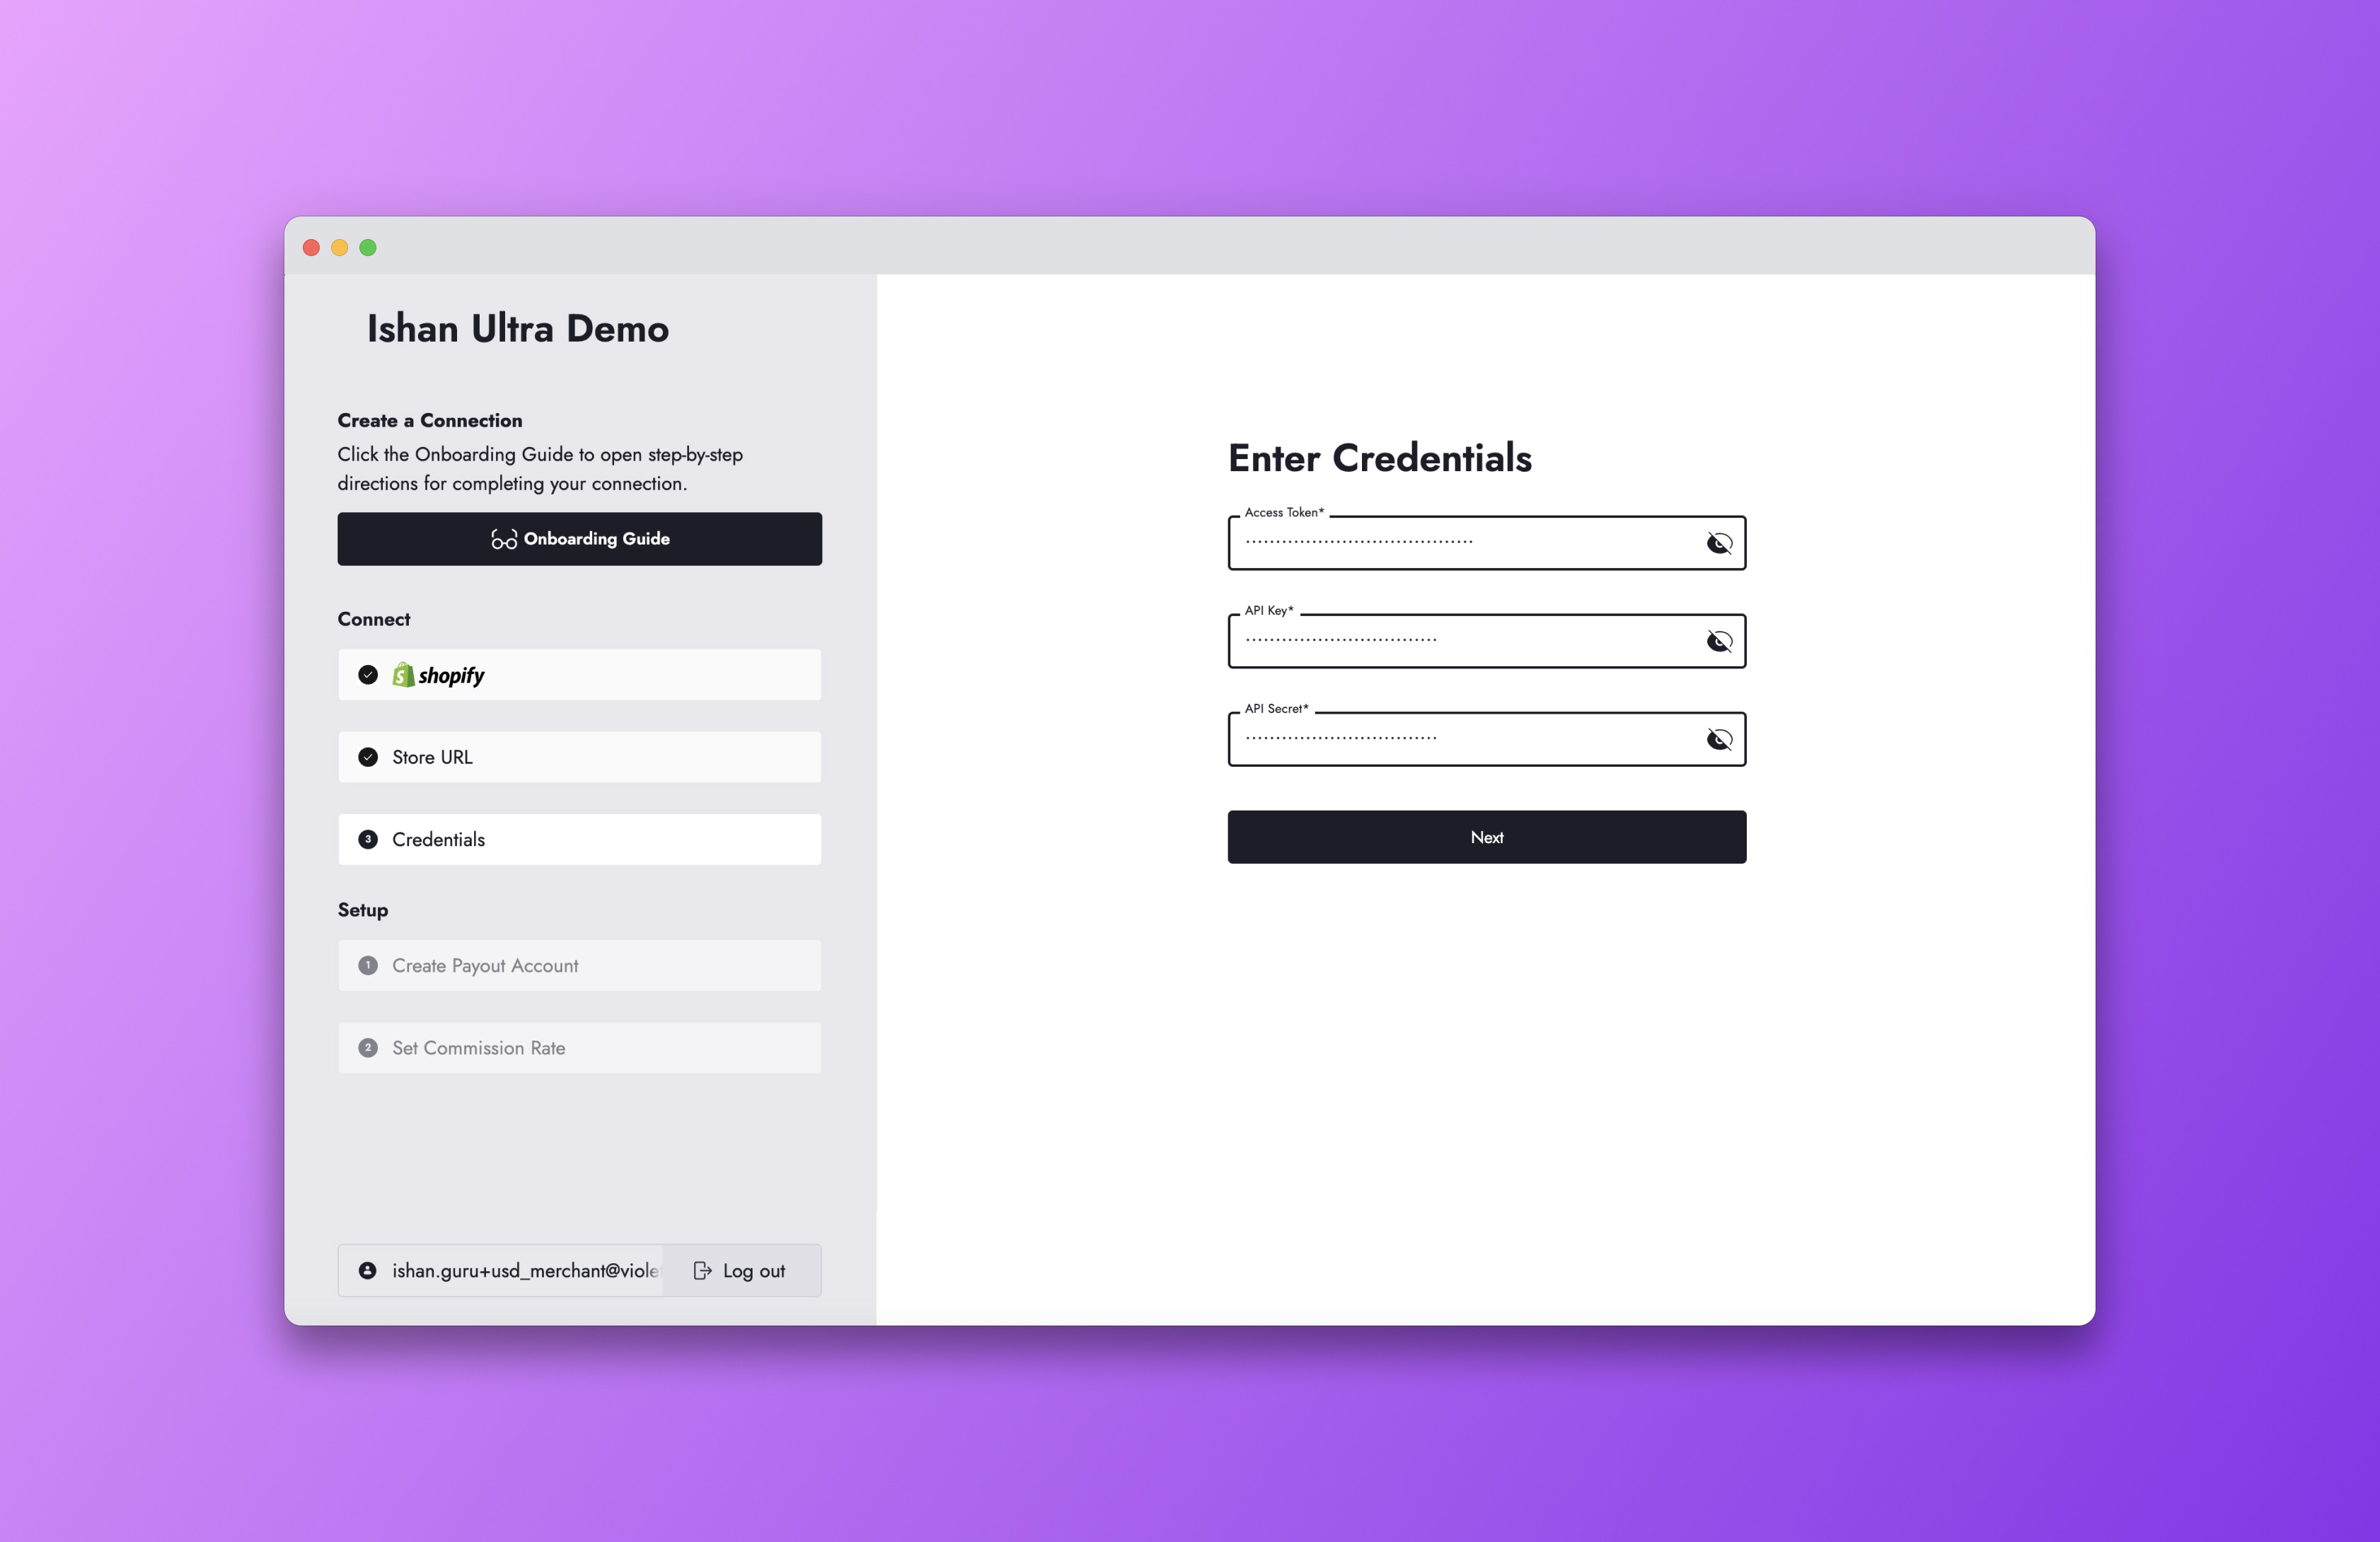
The next step is inputting the credentials they have created from their merchant store. The platform specific onboarding guide will show your merchant how to access these.
The next step is inputting the credentials they have created from their merchant store. The platform specific onboarding guide will show your merchant how to access these.


Step 4
Step 4
Your merchant will then need to create a payout account. To create a payout account, select the country your bank account is in. You will automatically be routed to Stripe’s onboarding flow to connect a payout account and complete KYC. You can learn more about this process in the Stripe KYC Guide.
Your merchant will then need to create a payout account. To create a payout account, select the country your bank account is in. You will automatically be routed to Stripe’s onboarding flow to connect a payout account and complete KYC. You can learn more about this process in the Stripe KYC Guide.


Step 5
Step 5
Your merchant will now be prompted to select a commission rate. This commission rate only applies to orders placed from your application and is usually pre-agreed upon by you and the merchant. You can confirm whether or not the correct commission rate was set by your merchant on your dashboard.
Your merchant will now be prompted to select a commission rate. This commission rate only applies to orders placed from your application and is usually pre-agreed upon by you and the merchant. You can confirm whether or not the correct commission rate was set by your merchant on your dashboard.


Step 6
Step 6
Your merchant is all set! They’ll now be redirected to the URL you configured in your app settings.
Your merchant is all set! They’ll now be redirected to the URL you configured in your app settings.


Step 1
Select platform
Step 2
Enter your Store URL
Step 3
Enter Credentials
Step 4
Create Payout Account
Step 5
Commission Rate
Step 6
Success!
Step 1
Select platform
Step 2
Enter your Store URL
Step 3
Enter Credentials
Step 4
Create Payout Account
Step 5
Commission Rate
Step 6
Success!